Kylo UI and SSL
Overview
This guide provides details on what configuration changes are required to enable Kylo UI to use SSL. Broadly, the changes will be two-fold:
- Changes to Kylo UI
- Changes to Nifi
1. Changes to Kylo UI
1.1 Create Self-Signed Certificate in a Keystore
Lets assume you are in a development mode and you want to try out Kylo UI on SSL. You will need a self-signed certificate which is stored in a keystore. Make note of the kylo-ui.jks path, which we will refer to in the following section when updating Kylo UI properties.
If you are in production, you would have your certificate issued by a trusted certificate authority. You can then import it to your keystore.
mkdir /opt/kylo/ssl

# Generate keys and keystore
keytool -genkeypair -alias kylo-ui -dname cn=kylo-ui -validity 10000 -keyalg RSA -keysize 2048 -keystore kylo-ui.jks -keypass changeit -storepass changeit

# Create certificate sign request
keytool -certreq -alias kylo-ui -file localhost.csr -keystore kylo-ui.jks -keypass changeit -storepass changeit

# Create certificate
keytool -gencert -alias kylo-ui -infile localhost.csr -outfile localhost.crt -ext SubjectAlternativeName=dns:localhost -keystore kylo-ui.jks -keypass changeit -storepass changeit

# Import certificate into keystore
keytool -importcert -alias kylo-ui -file localhost.crt -keystore kylo-ui.jks -keypass changeit -storepass changeit

chown -R kylo /opt/kylo/ssl
1.2 Kylo UI Application Properties
Add following properties to /opt/kylo/kylo-ui/conf/application.properties. Change the port to your liking and update path to keystore ‘kylo-ui.jks’ we generated in previous section.
server.ssl.enabled=true
server.port=8444
server.ssl.key-store=/opt/kylo/ssl/kylo-ui.jks
server.ssl.key-store-password=changeit
server.ssl.key-store-type=jks
server.ssl.key-alias=kylo-ui
1.3 Restart Kylo UI
You can now restart Kylo UI and browse to https://localhost:8444/ops-mgr/index.html. The note protocol and port number have changed from default configuration and now are HTTPS and 8444 respectively. Since we are using a self-signed certificate, expect browsers to complain about inadequate security. That is okay for development purposes.
service kylo-ui restart
2. Changes to Nifi
2.1 Import Kylo UI’s Certificate into a Truststore
You can either import Kylo UI’s certificate ‘localhost.crt’, generated in step 1.1 Create Self-Signed Certificate in a Keystore, into a new truststore; or, if you are in a hurry, simply re-use Kylo UI’s keystore as Nifi’s truststore.
Create a new truststore and import the cert to keep things clean. Make sure ‘nifi’ user has access to this truststore, e.g. keep the truststore in /opt/nifi/data/ssl directory, which belongs to ‘nifi’ user.
mkdir /opt/nifi/data/ssl

# Import certificate into keystore
keytool -importcert -alias kylo-ui -file localhost.crt -keystore kylo-ui-truststore.jks -keypass changeit -storepass changeit

chown -R nifi /opt/nifi/data/ssl
2.2 Setup StandardSSLContextService in Nifi
Add StandardSSLContextService in Nifi at the root level next to all other controller services.
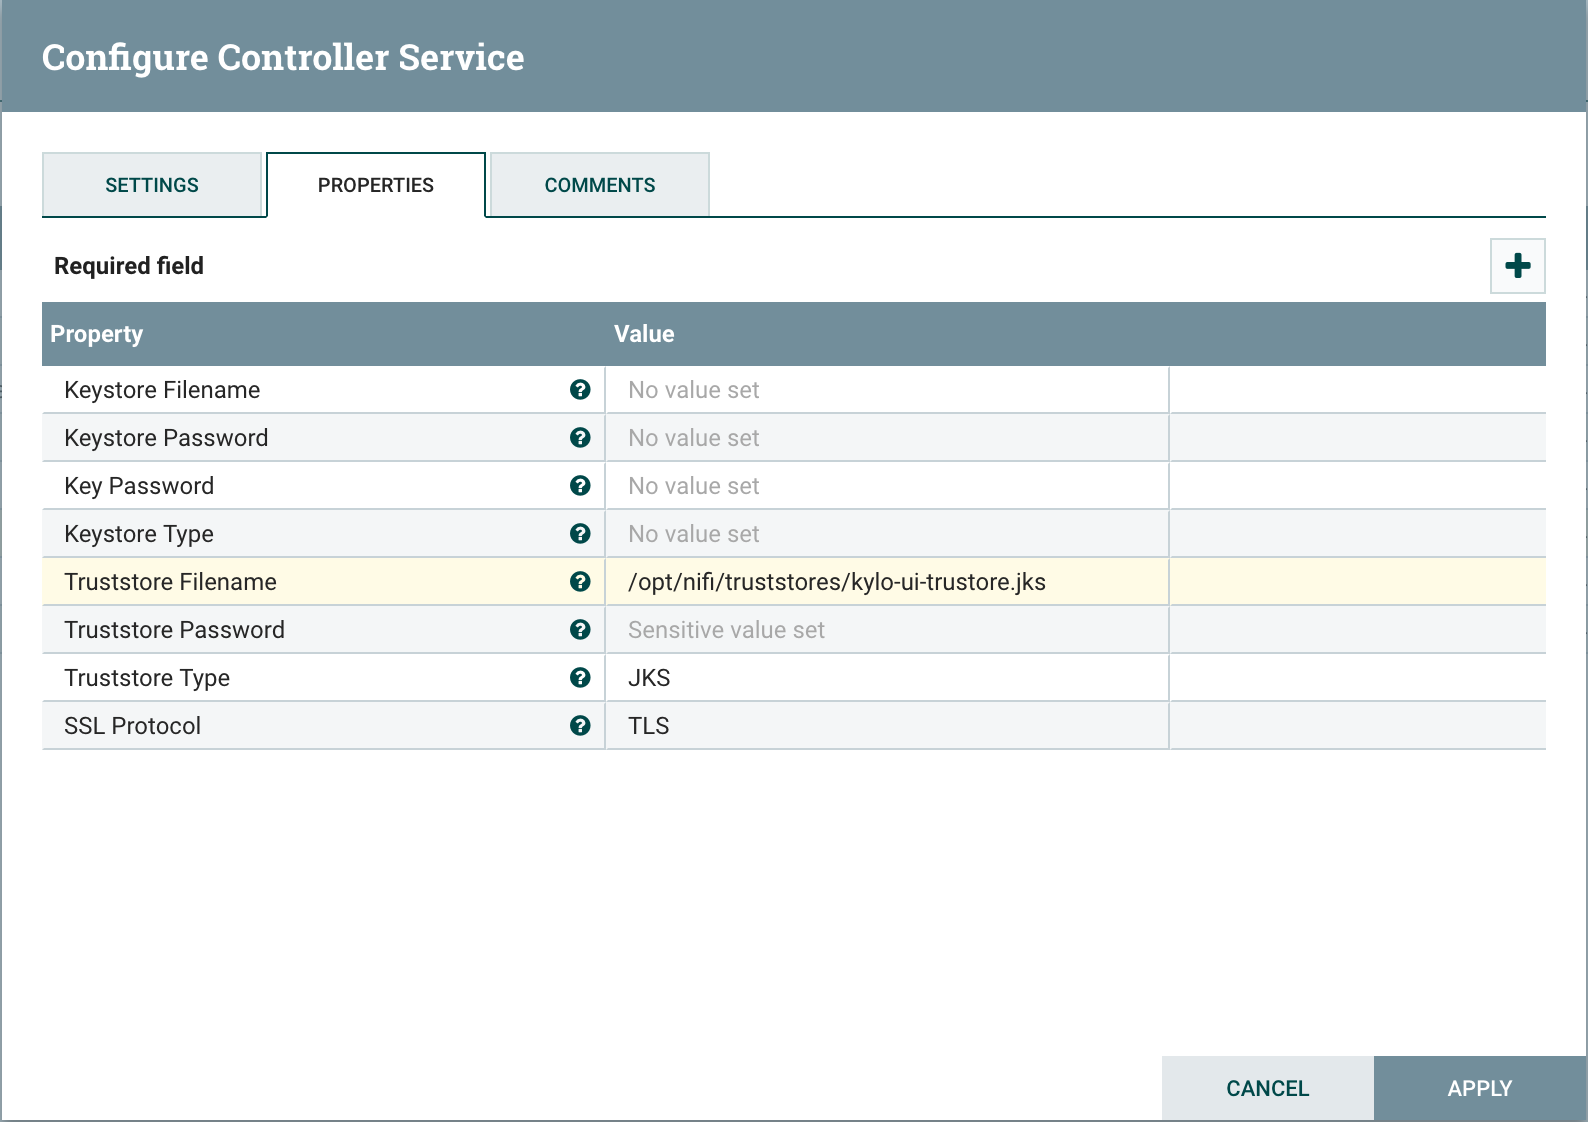
Set following properties on SSL Context Service:
| Truststore Filename: | |
|---|---|
| /opt/nifi/data/ssl/kylo-ui-truststore.jks | |
| Truststore Password: | |
| changeit | |
| Truststore Type: | |
| JKS | |
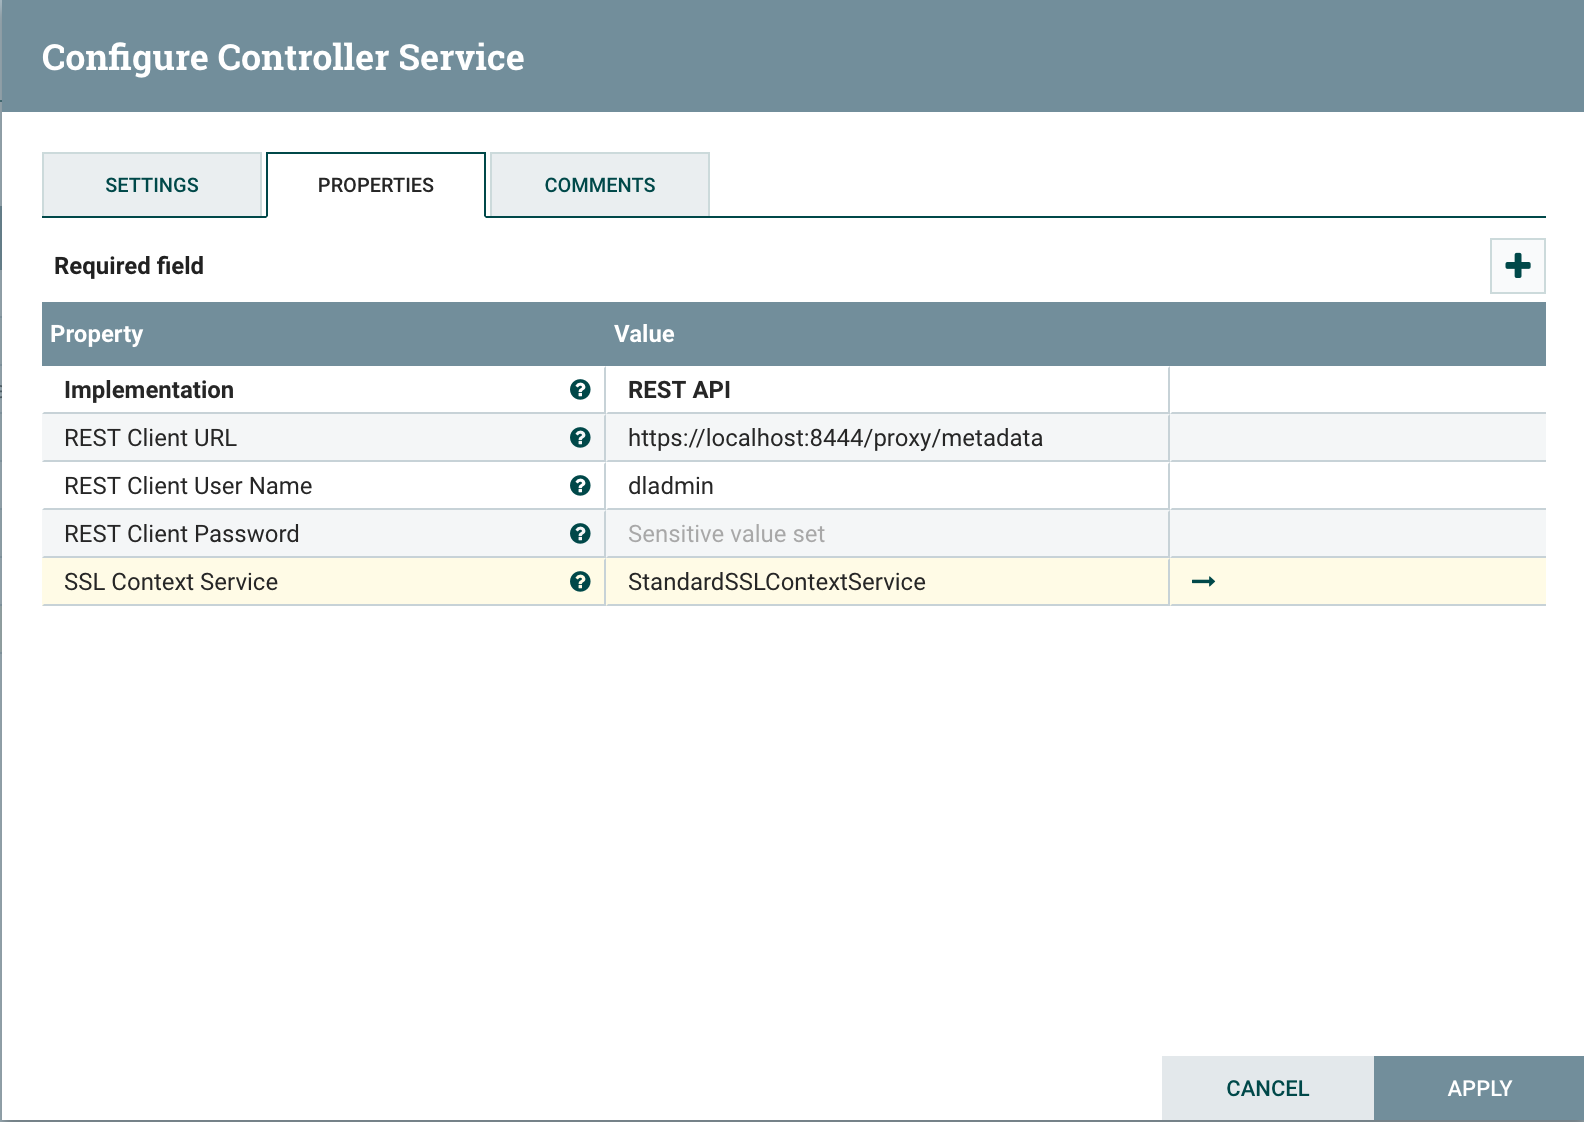
2.3 Update MetadataProviderSelectorService
Update MetadataProviderSelectorService. Set the following properties on MetadataProviderSelectorService, making sure host and port correspond to where Kylo UI is running:
| REST Client URL: | |
|---|---|
| https://localhost:8444/proxy/metadata | |
| SSL Context Service: | |
| StandardSSLContextService | |