EMR Persistent Cluster Kylo Installation Guide
About
The Kylo team provides two ways to deploy Kylo with EMR:
- Deploy Kylo to an edge node with an existing persistent EMR cluster. There is an S3 ingest template that will ingest data in S3 and land data in S3 which allows you to avoid passing data through NiFi.
- Deploy the Kylo enterprise EMR plugin which is a set of Nifi processors, Nifi templates and scripts that are designed to aid in the management of an EMR cluster to provide the ability to start, stop or check status of and EMR cluster from within Nifi. In conjunction with a modified S3 Standard Ingest Template, Kylo effectively provides an ephemeral cluster that can be as large as needed for processing and the permanence and the reliability of storing all resources in S3.
This guide provides instructions on how to configure Kylo to communicate with a persistent EMR cluster (Option #1). If you are interested in learning more about the EMR enterprise plugin please contact Teradata
This guide will help you do you following:
- Create an EMR persistent cluster (At this time we used EMR 5.15)
- Create an EMR edge node that can communicate with the cluster.
- Install the Kylo stack
- Install the S3 Ingest template to land data in S3 rather than HDFS
Creating an EMR edge node is challenging and there weren’t any good instructions at the time of this writing. The Kylo team recommends installing Kylo on edge nodes rather than on a master node of a cluster.
Let get started !!
Create an EMR Cluster
You can either create a new EMR cluster or leverage an existing EMR cluster that you have. This section provides an example on how to spin up an EMR cluster
- Create an S3 bucket for your EMR cluster. It must be in the same region as the EMR cluster
- Create a folder in the S3 bucket called “logs”.
- Click the button to create an EMR cluster
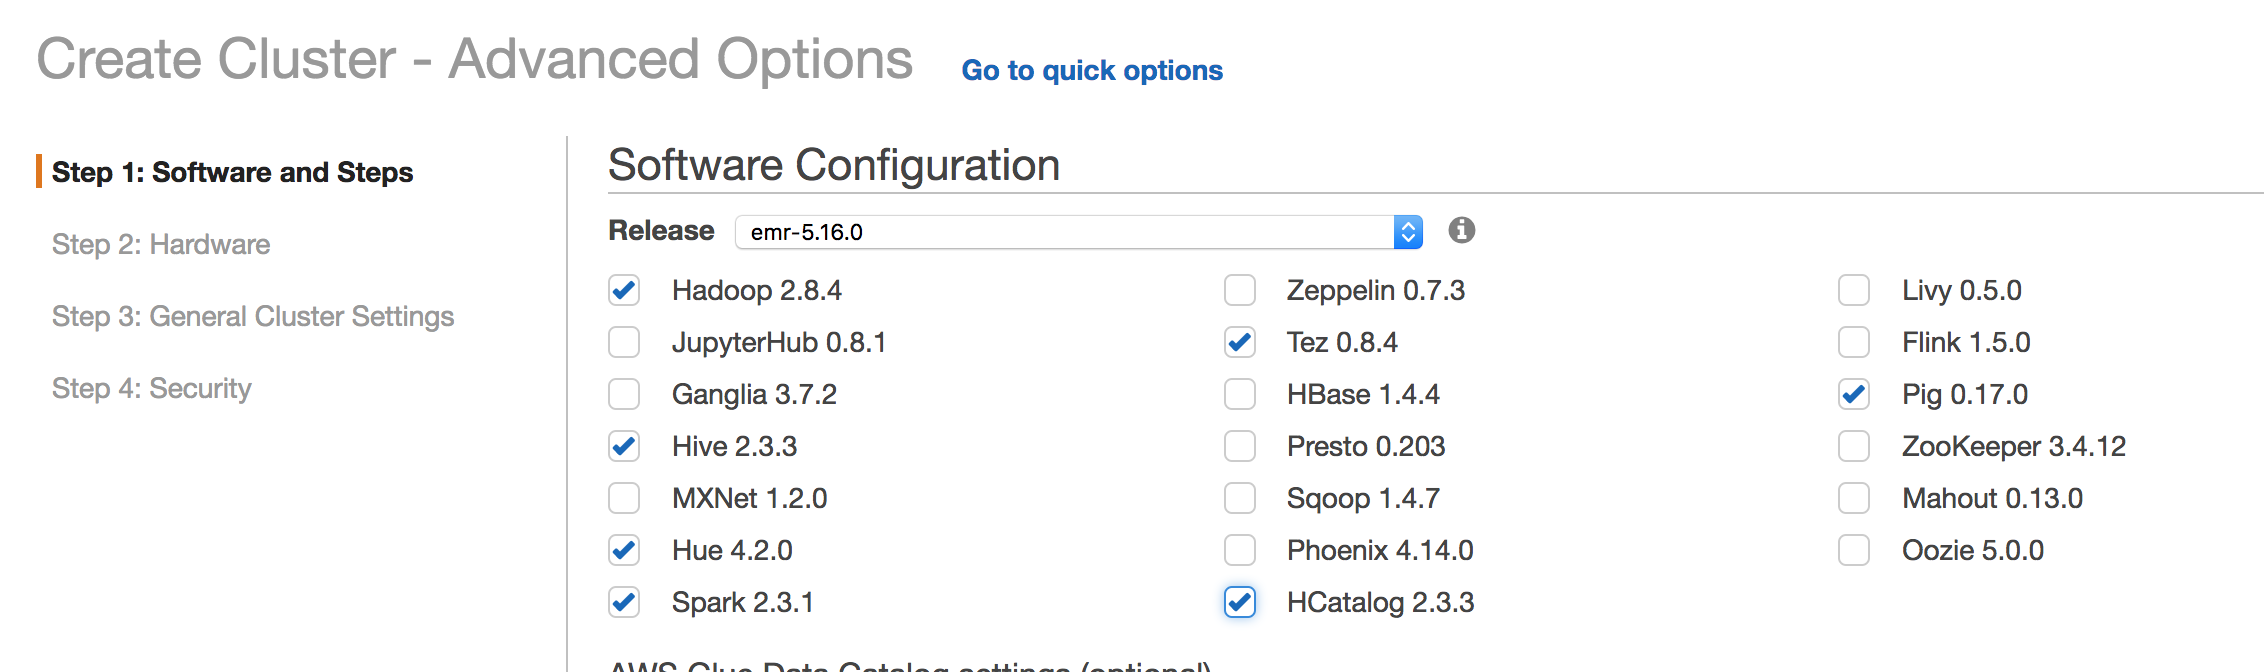
- Go to the advanced settings and make sure Hadoop, Hive, Spark, Tez, and HCatalog are chosen
- Choose the hardware to meet your requirements

- For logging, choose the S3 bucket and folder you created. For example, s3://my.bucket/logs/
- Complete the rest of the steps and create the EMR cluster
Create a Kylo EMR edge node
The next step is to create a new CentOS EC2 instance to install Kylo on. Make sure to create it in the same VPC and Subnet as the EMR cluster
- Go to the EC2 page and click on “Launch Instance” in the same region you created the EMR cluster in.
- Under “AWS Marketplace” choose the “CentOS 7 (x86_64) - with Updates HVM” AMI.
- Make sure to choose at least 8 vCPUs and 16GB RAM
- Create the EC2 instance in the same VPC as the EMR cluster
- Finish creating and launching your EC2 instance
Configure Security Groups
For this installation we will open up all ports between the EMR master, slave, and Kylo edge node. If you prefer to open up only the required ports please see the dependencies page
- Modify the Master and Slave security groups to allow access from the Kylo EC2 instance.
- Modify the security group for the Kylo edge node to allow access from the master and slave nodes
Install Kylo on Edge Node
- SSH into the edge node and su to the root user
- Run the following commands
yum install -y wget
wget http://bit.ly/2KDX4cy -O /opt/kylo-0.9.1.1.rpm
useradd -r -m -s /bin/bash nifi && useradd -r -m -s /bin/bash kylo && useradd -r -m -s /bin/bash activemq
cat /etc/passwd (verify the users were created)
rpm -ivh /opt/kylo-0.9.1.1.rpm
Copy EMR libraries to Edge Node
To make the edge node work with the EMR cluster we need to copy some configuration files and library folders over
# Run the below commands as root

mkdir -p /usr/lib/spark
mkdir -p /usr/lib/hive-webhcat/share/hcatalog
vi  /etc/profile.d/spark.sh
    export SPARK_HOME=/usr/lib/spark
    export PATH=$SPARK_HOME/bin:$PATH
    export HADOOP_CONF_DIR=/etc/hadoop/conf
    export SPARK_CONF_DIR=/etc/spark/conf

source /etc/profile.d/spark.sh
mkdir -p /etc/hadoop/conf
chown -R kylo:kylo /etc/hadoop/conf
mkdir -p /etc/spark/conf
chown -R kylo:kylo /etc/spark/conf
mkdir -p /usr/share/aws /usr/lib/sqoop /usr/lib/hadoop-yarn /usr/lib/hadoop-mapreduce /usr/lib/hadoop-hdfs /usr/lib/hadoop
chown kylo:kylo /usr/share/aws /usr/lib/sqoop /usr/lib/hadoop-yarn /usr/lib/hadoop-mapreduce /usr/lib/hadoop-hdfs /usr/lib/hadoop

export MASTER_PRIVATE_IP=<MASTER_NODE_IP_ADDRESS>
export PEM_FILE=/home/centos/.ssh/id_rsa
scp -i /home/centos/.ssh/id_rsa hadoop@$MASTER_PRIVATE_IP:/etc/hadoop/conf/core-site.xml /etc/hadoop/conf
scp -i /home/centos/.ssh/id_rsa hadoop@$MASTER_PRIVATE_IP:/etc/hadoop/conf/yarn-site.xml /etc/hadoop/conf
scp -i /home/centos/.ssh/id_rsa hadoop@$MASTER_PRIVATE_IP:/etc/hadoop/conf/hdfs-site.xml /etc/hadoop/conf
scp -i /home/centos/.ssh/id_rsa hadoop@$MASTER_PRIVATE_IP:/etc/hadoop/conf/mapred-site.xml /etc/hadoop/conf

rsync -avz --delete -e "ssh -o StrictHostKeyChecking=no -o ServerAliveInterval=10 -i $PEM_FILE" hadoop@$MASTER_PRIVATE_IP:'/usr/lib/spark/*' /usr/lib/spark
rsync -avz --delete -e "ssh -o StrictHostKeyChecking=no -o ServerAliveInterval=10 -i $PEM_FILE" hadoop@$MASTER_PRIVATE_IP:'/usr/lib/sqoop/*' /usr/lib/sqoop
rsync -avz --delete -e "ssh -o StrictHostKeyChecking=no -o ServerAliveInterval=10 -i $PEM_FILE" hadoop@$MASTER_PRIVATE_IP:'/usr/lib/hadoop/*' /usr/lib/hadoop
rsync -avz --delete -e "ssh -o StrictHostKeyChecking=no -o ServerAliveInterval=10 -i $PEM_FILE" hadoop@$MASTER_PRIVATE_IP:'/usr/lib/hadoop-yarn/*' /usr/lib/hadoop-yarn
rsync -avz --delete -e "ssh -o StrictHostKeyChecking=no -o ServerAliveInterval=10 -i $PEM_FILE" hadoop@$MASTER_PRIVATE_IP:'/usr/lib/hadoop-mapreduce/*' /usr/lib/hadoop-mapreduce
rsync -avz --delete -e "ssh -o StrictHostKeyChecking=no -o ServerAliveInterval=10 -i $PEM_FILE" hadoop@$MASTER_PRIVATE_IP:'/usr/lib/hadoop-hdfs/*' /usr/lib/hadoop-hdfs
rsync -avz --delete -e "ssh -o StrictHostKeyChecking=no -o ServerAliveInterval=10 -i $PEM_FILE" hadoop@$MASTER_PRIVATE_IP:'/usr/share/aws/*' /usr/share/aws

rsync -avz --delete -e "ssh -o StrictHostKeyChecking=no -o ServerAliveInterval=10 -i $PEM_FILE" hadoop@$MASTER_PRIVATE_IP:'/etc/spark/conf/*' /etc/spark/conf

echo "spark.hadoop.yarn.timeline-service.enabled false" >> /etc/spark/conf/spark-defaults.conf

# You might need to ls for this file on the master node since the version could be different
scp -o StrictHostKeyChecking=no -o ServerAliveInterval=10 -i $PEM_FILE hadoop@$MASTER_PRIVATE_IP:/usr/lib/hive-hcatalog/share/hcatalog/hive-hcatalog-core-2.3.3-amzn-1.jar /usr/lib/hive-webhcat/share/hcatalog/hive-hcatalog-core.jar
Install MariaDB
# Run the following commands as root

yum install -y zip unzip mariadb mariadb-server lsof
systemctl enable mariadb
systemctl start mariadb

# Note: Replace <PASSWORD> with the root password you want to use
printf "\nY\n<PASSWORD>\n<PASSWORD>\nY\nY\nY" | mysql_secure_installation

# Test that the password works
mysql -p
Install Java 8
yum install -y java-1.8.0-openjdk-devel

vi /etc/profile.d/java.sh
    export JAVA_HOME=/etc/alternatives/java_sdk_1.8.0
    export PATH=$JAVA_HOME/bin:$PATH

source /etc/profile.d/java.sh
Run the Kylo setup wizard
Next we will run the Kylo setup wizard to install NiFi, ActiveMQ, and Elasticsearch
# run the following as root

# Install everything. Choose yes to allow Kylo to manage the database and choose option #1 for the Java install
/opt/kylo/setup/setup-wizard.sh
Test Spark on the edge node
We want to test that spark words from the command line before running it from Kylo
# You should ls to verify the JAR path
ls /usr/lib/spark/examples/jars/spark-examples_ <HIT TAB>
spark-submit --class org.apache.spark.examples.SparkPi --master yarn --driver-memory 512m --executor-memory 512m --executor-cores 1 /usr/lib/spark/examples/jars/spark-examples_2.11-2.3.1.jar 10

# Check the Yarn UI to verify it was successful
http://<MASTER_NODE>:8088/cluster
Open up permissions to the mnt folders
Temporary files are written to the /mnt and /mnt1 folders when the ingest template is processing
chmod 777 /mnt
mkdir /mnt1
chmod -R 777 /mnt1
Prepare the EMR cluster
- Create the kylo and nifi users on the EMR Master Node
# Run as root on the master node
useradd -r -m -s /bin/bash nifi
useradd -r -m -s /bin/bash kylo
- Create the Kylo and NiFi users in HDFS
su - hdfs
hdfs dfs -mkdir /user/kylo
hdfs dfs -chown kylo:kylo /user/kylo
hdfs dfs -mkdir /user/nifi
hdfs dfs -chown nifi:nifi /user/nifi
hdfs dfs -ls /user
Edit the Kylo Properties Files
- Retrieve the hive metastore password on the EMR master node
cat /etc/hive/conf/hive-site.xml | grep -B 5 -A 5 Password
- Modify the Kylo properties files
vi /opt/kylo/kylo-services/conf/application.properties

    spring.datasource.username=root
    spring.datasource.password=<ROOT_PASSWORD_FROM_STEPS_ABOVE>

    security.auth.file.groups=file:///opt/kylo/groups.properties

    metadata.datasource.username=${spring.datasource.username}
    metadata.datasource.password=${spring.datasource.password}

    hive.datasource.url=jdbc:hive2://<MASTER_DNS_NAME>:10000/default
    hive.datasource.username=hive

    hive.metastore.datasource.url=jdbc:mysql://<MASTER_DNS_NAME>:3306/hive
    hive.metastore.datasource.username=hive
    hive.metastore.datasource.password=<PASSWORD_FROM_GREP_ABOVE>

    modeshape.datasource.username=${spring.datasource.username}
    modeshape.datasource.password=${spring.datasource.password}

    nifi.service.mysql.database_user=root
    nifi.service.mysql.password=<PASSWORD>

    nifi.service.kylo_mysql.database_user=root
    nifi.service.kylo_mysql.password=<PASSWORD>

    nifi.service.hive_thrift_service.database_connection_url=jdbc:hive2://<MASTER_DNS_NAME>:10000/default

    nifi.service.kylo_metadata_service.rest_client_password=<KYLO_ADMIN_PASSWORD>

    nifi.executesparkjob.sparkhome=/usr/lib/spark
    nifi.executesparkjob.sparkmaster=yarn-cluster

    config.spark.validateAndSplitRecords.extraJars=/usr/lib/hive-webhcat/share/hcatalog/hive-hcatalog-core.jar,/usr/lib/spark/jars/datanucleus-api-jdo-3.2.6.jar,/usr/lib/spark/jars/datanucleus-core-3.2.10.jar,/usr/lib/spark/jars/datanucleus-rdbms-3.2.9.jar
    nifi.executesparkjob.extra_jars=/usr/lib/spark/jars/datanucleus-api-jdo-3.2.6.jar,/usr/lib/spark/jars/datanucleus-core-3.2.10.jar,/usr/lib/spark/jars/datanucleus-rdbms-3.2.9.jar
    nifi.executesparkjob.extra_files=$nifi{table_field_policy_json_file},/etc/spark/conf/hive-site.xml
    config.spark.version=2
- Modify spark.properties
vi /opt/kylo/kylo-services/conf/spark.properties

spark.shell.deployMode = cluster
spark.shell.master = yarn
spark.shell.registrationUrl=http://<KYLO_EDGE_DNS_NAME>:8400/proxy/v1/spark/shell/register
Start Kylo and NiFi
- Start up Kylo and NiFi
service nifi start

kylo-service start
- Login to the NiFi and Kylo UI to test that it’s up and running
Install the S3 Ingest Template
This section follows the steps from the S3 Data Ingest Template how to page
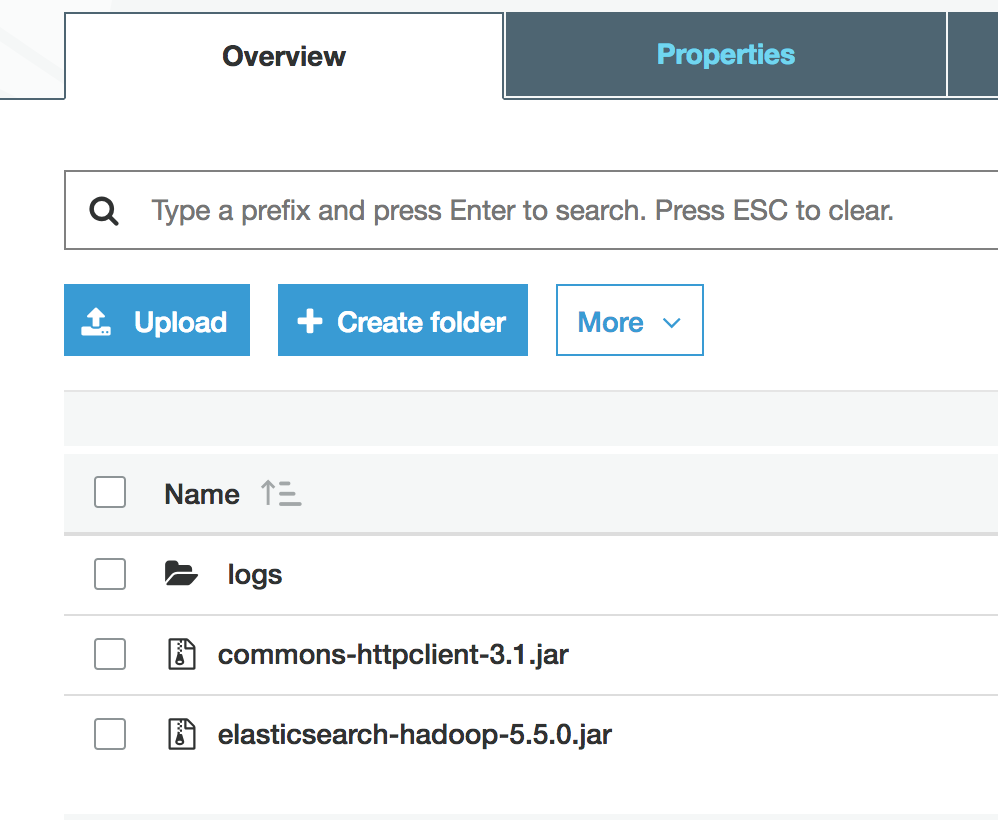
- Upload required Jars to the S3 EMR bucket you created above
- Modify core-site.xml file on the Kylo edge and the EMR master node
For the S3 ingest template to work you need to set some S3 properties in the core-site.xml on both the Kylo edge node AND the EMR master node
vi /etc/hadoop/conf/core-site.xml

      <property>
        <name>fs.s3.awsAccessKeyId</name>
        <value>xxxxxx</value>
      </property>
      <property>
        <name>fs.s3.awsSecretAccessKey</name>
        <value>xxxxxx</value>
      </property>
      <property>
        <name>fs.s3a.awsAccessKeyId</name>
        <value>xxxxxx</value>
      </property>
      <property>
        <name>fs.s3a.awsSecretAccessKey</name>
        <value>xxxxxx</value>
      </property>
      <property>
        <name>fs.s3n.access.key</name>
        <value>xxxxx</value>
      </property>
      <property>
        <name>fs.s3n.secret.key</name>
        <value>xxxxxxx</value>
      </property>
- Restart the namenode
Restart the namenode from the master node
stop hadoop-hdfs-namenode
status hadoop-hdfs-namenode
start hadoop-hdfs-namenode
- Update application.properties to prepare for the template
Add the following properties to the kylo-services application.properties file
vi /opt/kylo/kylo-services/conf/application.properties

    config.s3ingest.s3.protocol=s3a
    config.s3ingest.hiveBucket=<S3_BUCKET>
    config.s3ingest.es.jar_url=s3a://<S3_BUCKET>/elasticsearch-hadoop-5.5.0.jar
    config.s3ingest.apache-commons.jar_url=s3a://<S3_BUCKET>/commons-httpclient-3.1.jar
    config.s3ingest.es.nodes=<KYLO_NODE_IP_ADDRESS>
- Restart kylo-services
service kylo-services restart
- Allow Access to Elasticsearch from the Cluster
The S3 ingest template creates a hive index table based on Elasticsearch. We need to make sure Elasticsearch allows access from external nodes.
 vi /etc/elasticsearch/elasticsearch.yml
    # Modify this property
    network.host: 0.0.0.0

service elasticsearch restart
Import the S3 Ingest Template
Make sure to install the version of the S3 ingest template that matches your Kylo version. Be careful not to download it from the master branch in Github since the template may have changed. The template “s3_data_ingest.template.zip” is located in the /opt/kylo/setup/data/templates/nifi-1.0 folder. You will need to copy it to your local box to upload it via the browser
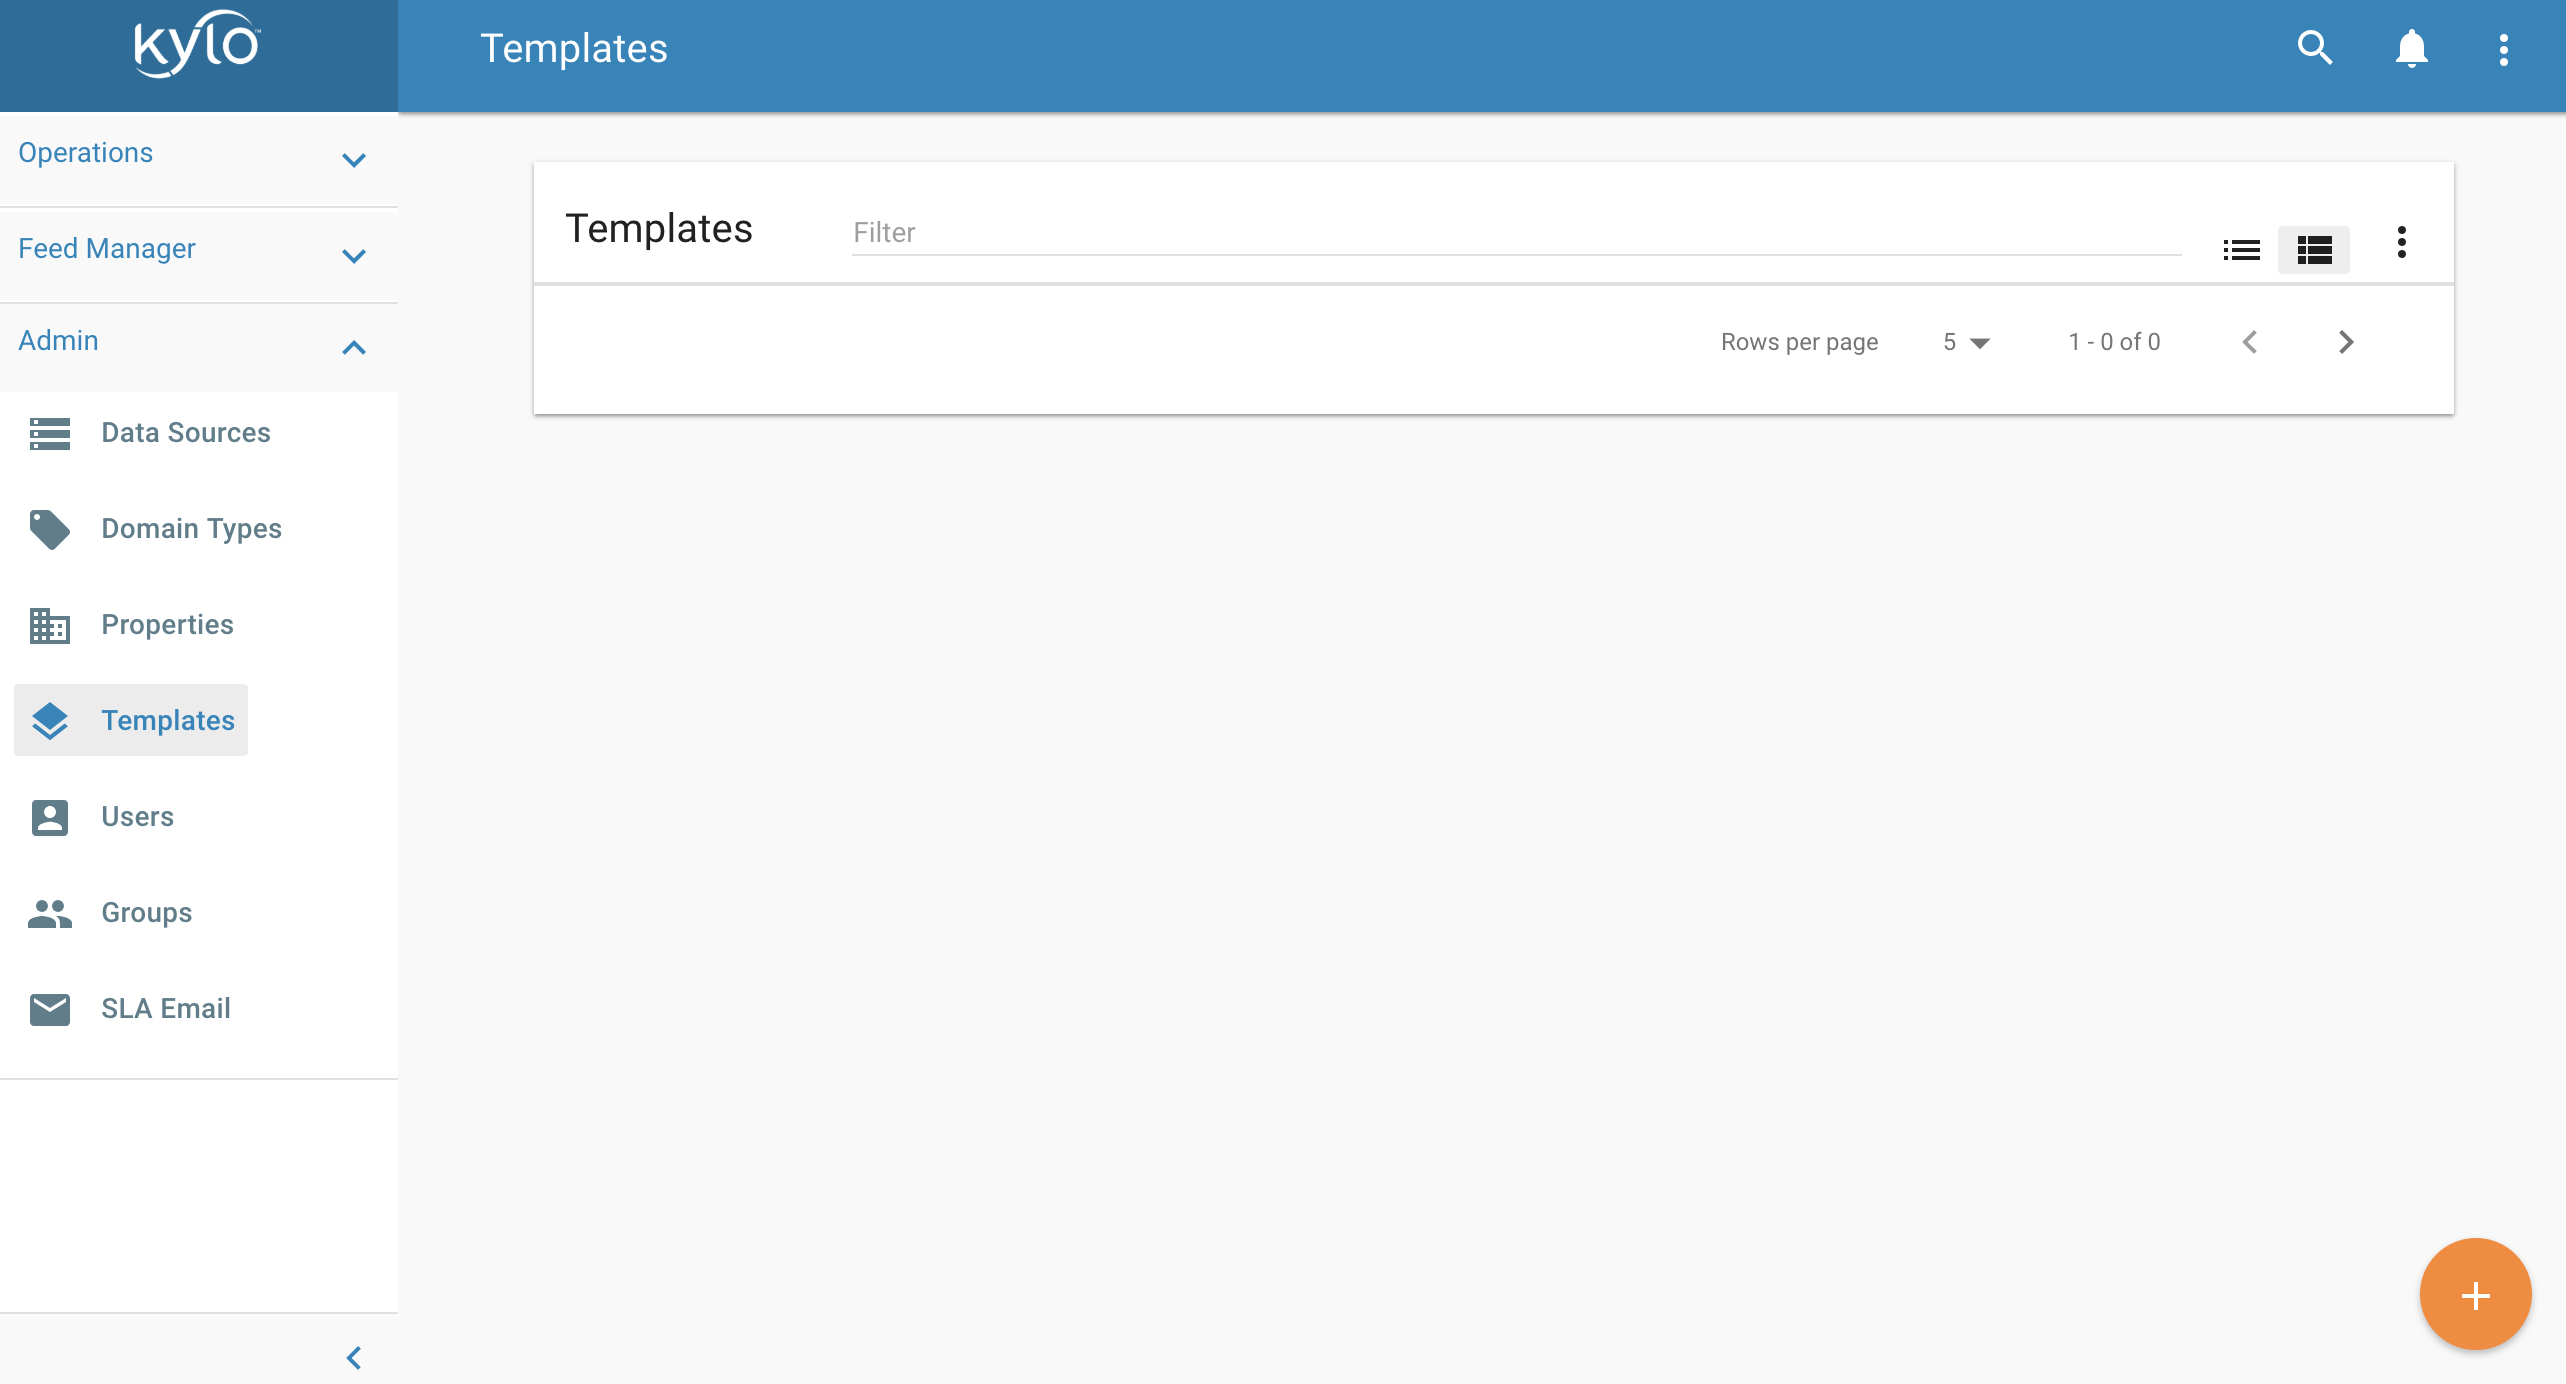
7.1 In Kylo go to the Admin –> Templates page and click the plus icon
7.2 Choose “Import from a File”
7.3 Choose the file and select “Import the Reusable Template”
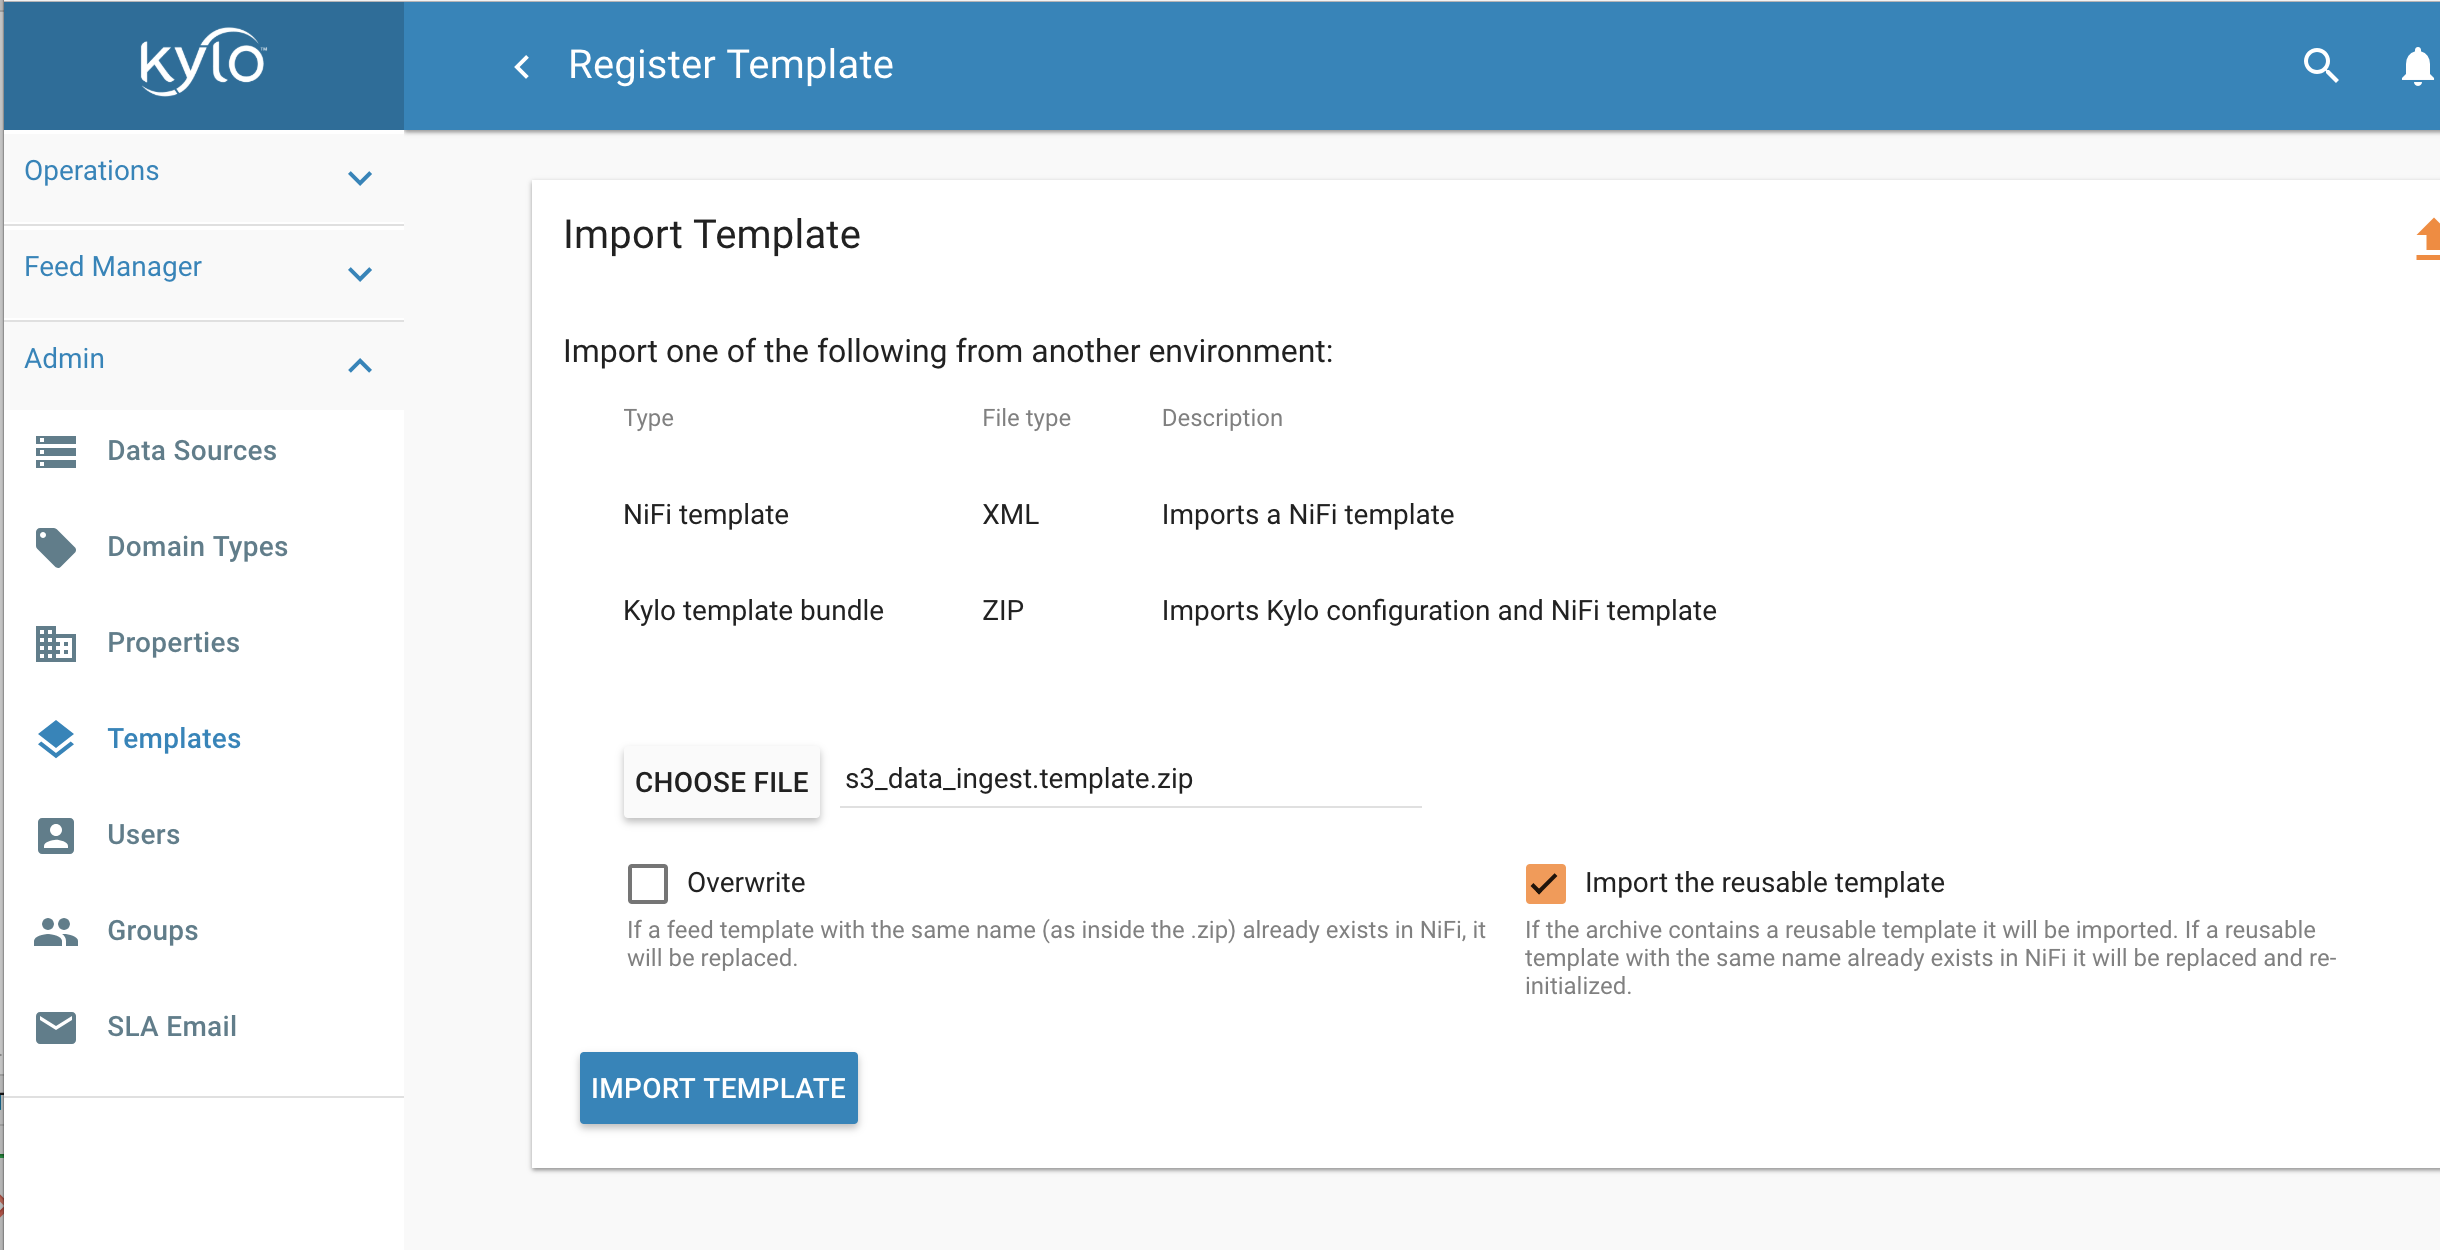
7.4 Click “Import Template”
Add the AWS credentials to the Controller Services
Disable and edit the AWSCredentialsProviderControllerService created when importing the S3 ingest template. Set the value for both the “Access Key” field and “Secret Key” field. Re-enable the controller service.
Create a Test Feed
- Go to the Categories page in Kylo and create a new Category
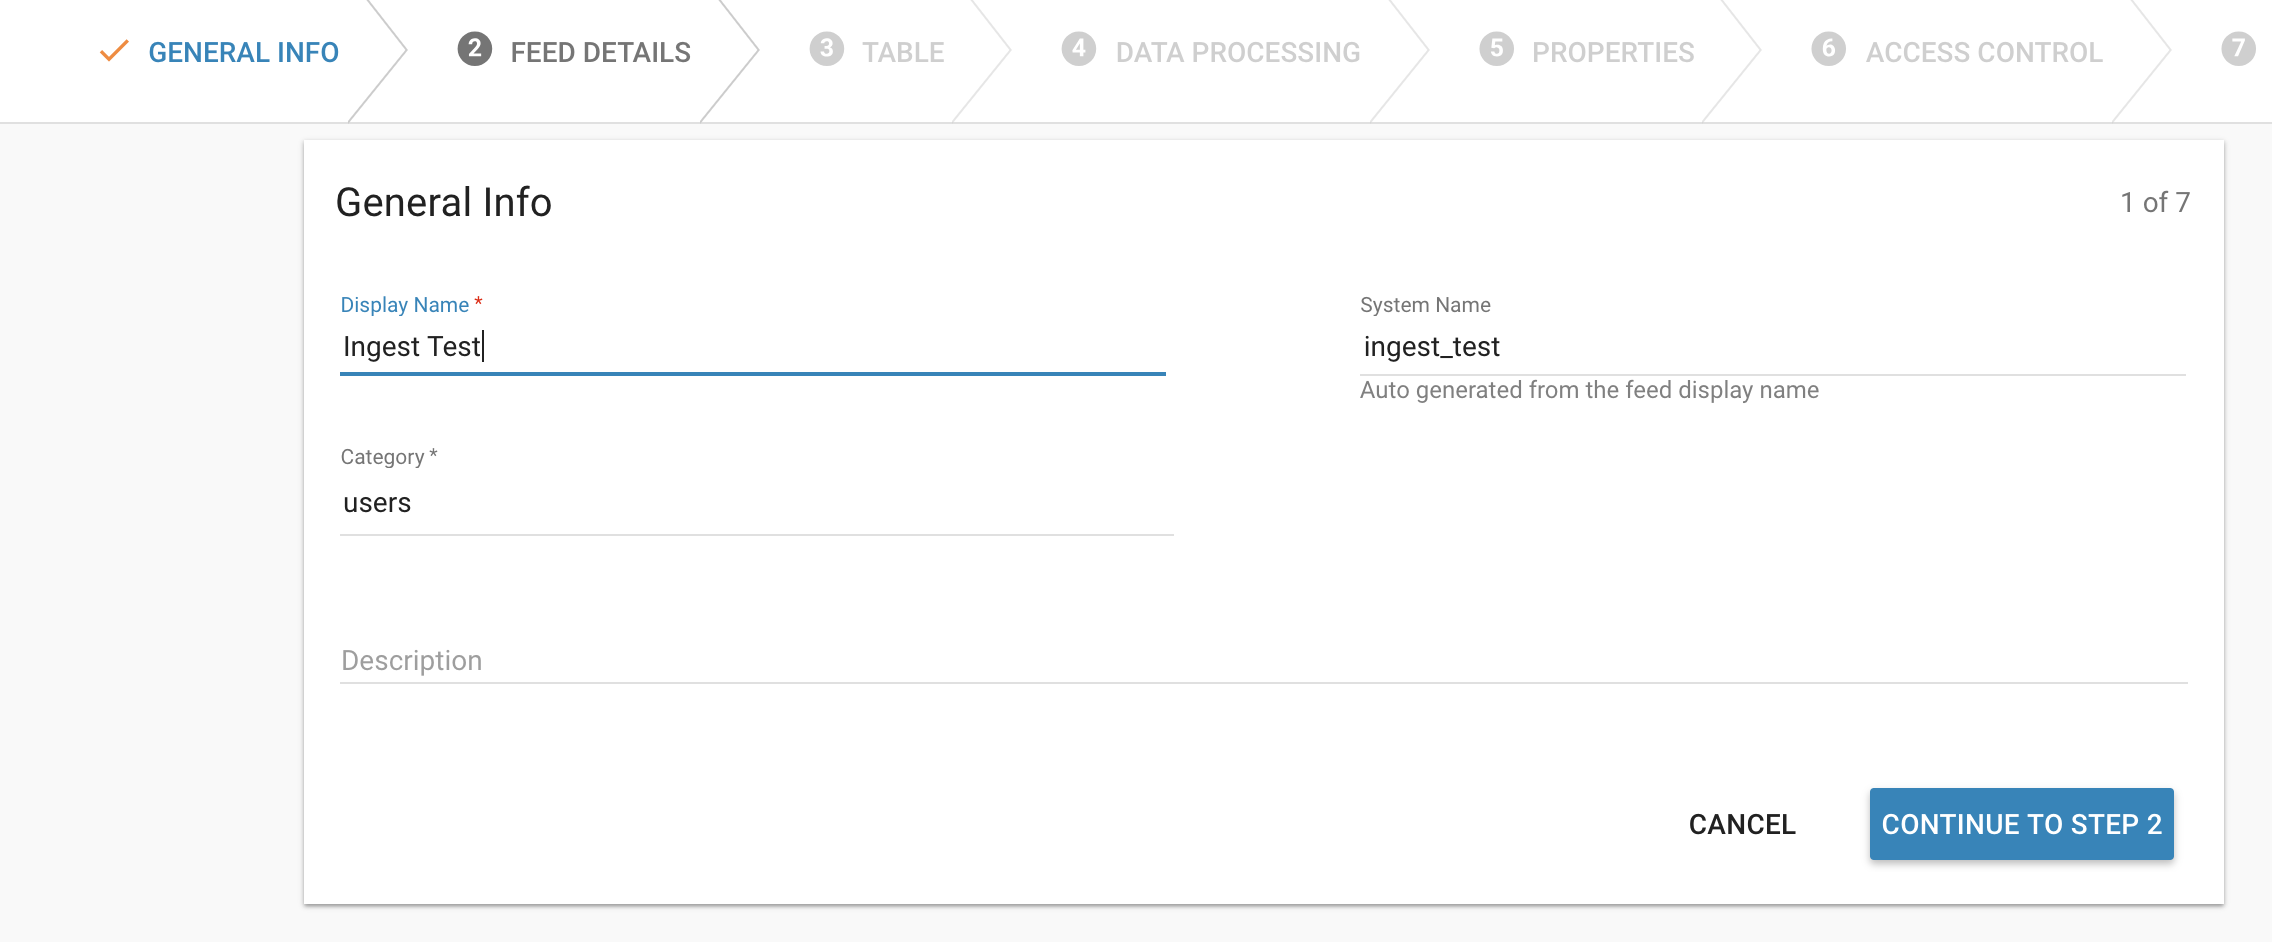
- Go to Feed Manager -> Feeds and click the plus icon to create a new feed
- Click the S3 Data Ingest template
- Give the feed a name and select a category. Then click “Continue to Step 2”
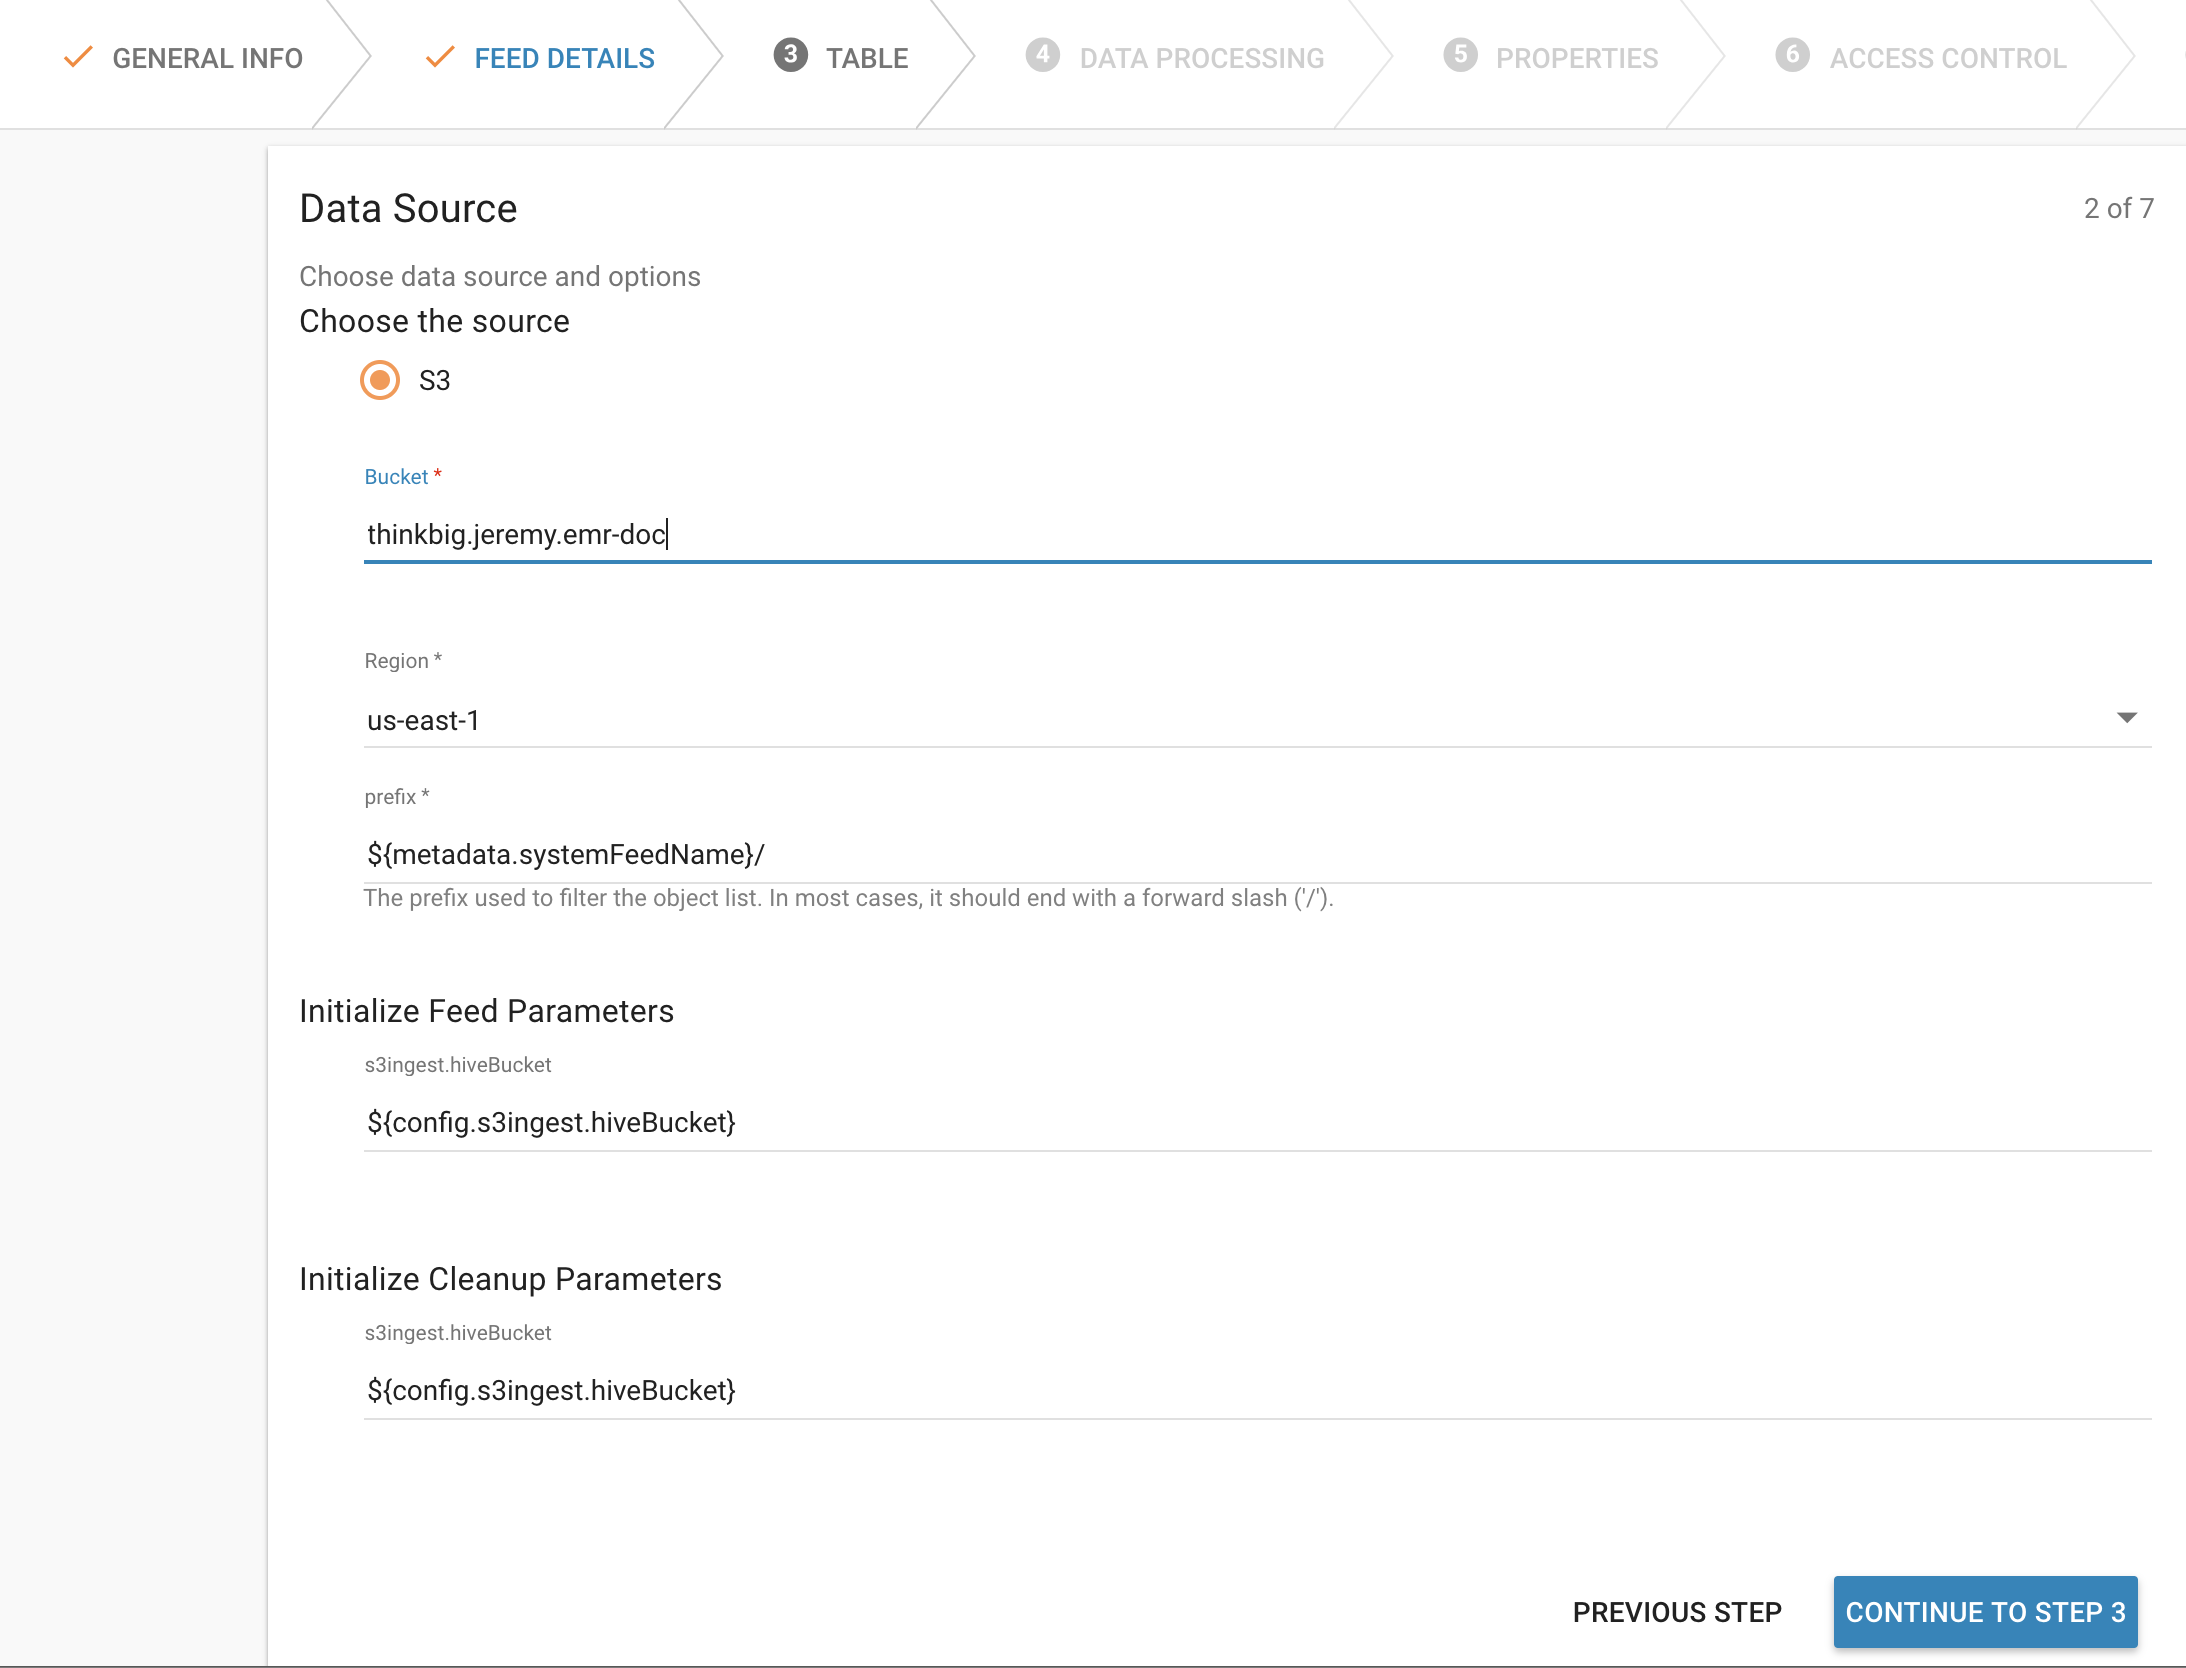
- Specify the S3 bucket you will drop a file in, as well as the AWS region. Click “Continue to Step 3”
- Choose a sample file and upload it. Then modify the data types as needed. Click “Continue to Step 4”
- Choose a few fields to be indexed so we can test that Elasticsearch indexing works. Then continue to step 7
- Change the schedule to be timer based and run every 15 seconds. Then click the “Create” button. The feed will be looking at a folder in your S3 bucket based on the feed name. Since I called the feed “Ingest Test” it will be looking at the <S3 Bucket>/ingest_test folder
- Drop a test file in the S3 bucket and folder you created for the feed.
Monitor NiFi and Kylo to verify the feed ran successfully.