Kerberos Installation Example - Cloudera
Important
This document should only be used for DEV/Sandbox purposes. It is useful to help quickly Kerberize your Cloudera sandbox so that you can test Kerberos features.
Prerequisite
Java
All client node should have java installed on it.
$ java version "1.7.0_80"
$ Java(TM) SE Runtime Environment (build 1.7.0_80-b15)
$ Java HotSpot(TM) 64-Bit Server VM (build 24.80-b11, mixed mode)

$ echo $JAVA_HOME
$ /usr/java/jdk1.7.0_80
Install Java Cryptography Extensions (JCE)
sudo wget -nv --no-check-certificate --no-cookies --header "Cookie:
oraclelicense=accept-securebackup-cookie"
http://download.oracle.com/otn-pub/java/jce/7/UnlimitedJCEPolicyJDK7.zip
-O
/usr/java/jdk1.7.0_80/jre/lib/security/UnlimitedJCEPolicyJDK7.zip

cd /usr/java/jdk1.7.0_80/jre/lib/security

sudo unzip UnlimitedJCEPolicyJDK7.zip

sudo cp UnlimitedJCEPolicy/* .

#sudo rm -r UnlimitedJCEPolicy*

ls -l
Test Java Cryptography Extension
Create a java Test.java and paste below mentioned code in it.
$ vi Test.java

import javax.crypto.Cipher;
class Test {
public static void main(String[] args) {
try {
  System.out.println("Hello World!");
  int maxKeyLen = Cipher.getMaxAllowedKeyLength("AES");
  System.out.println(maxKeyLen);
} catch (Exception e){
  System.out.println("Sad world :(");
}
}
}
Compile:
$ javac Test.java
Run test, the expected number is: 2147483647
$ java Test
Hello World!
2147483647
Install Kerberos
On a cluster, go to the master node for installation of Kerberos utilities.
- Install a new version of the KDC server:
yum install krb5-server krb5-libs krb5-workstation
- Using a text editor, open the KDC server configuration file, located by default here:
vi /etc/krb5.conf
Change the [realms] as below to “quickstart.cloudera” . Update KDC and Admin Server Information.
[logging]
default = FILE:/var/log/krb5libs.log
kdc = FILE:/var/log/krb5kdc.log
admin_server = FILE:/var/log/kadmind.log
default_realm = quickstart.cloudera
dns_lookup_realm = false
dns_lookup_kdc = false
ticket_lifetime = 24h
renew_lifetime = 7d
forwardable = true
[realms]
quickstart.cloudera = {
kdc = quickstart.cloudera
admin_server = quickstart.cloudera
}
Update /var/kerberos/krb5kdc/kdc.conf. Change the [realms] as “quickstart.cloudera”.
[kdcdefaults]
kdc_ports = 88
kdc_tcp_ports = 88
[realms]
quickstart.cloudera = {
  #master_key_type = aes256-cts
  acl_file = /var/kerberos/krb5kdc/kadm5.acl
  dict_file = /usr/share/dict/words
  admin_keytab = /var/kerberos/krb5kdc/kadm5.keytab
  supported_enctypes = aes256-cts:normal aes128-cts:normal
  des3-hmac-sha1:normal arcfour-hmac:normal des-hmac-sha1:normal
  des-cbc-md5:normal des-cbc-crc:normal
}
- Update /var/kerberos/krb5kdc/kadm5.acl and replace EXAMPLE.COM with “quickstart.cloudera”.
*/admin@quickstart.cloudera*
- Create the Kerberos Database. Use the utility kdb5_util to create the Kerberos database. While asking for password , enter password as thinkbig.
kdb5_util create -s
- Start the KDC. Start the KDC server and the KDC admin server.
/etc/rc.d/init.d/krb5kdc start
/etc/rc.d/init.d/kadmin start
Note
When installing and managing your own MIT KDC, it is very important to set up the KDC server to auto start on boot.
chkconfig krb5kdc on
chkconfig kadmin on
- Create a KDC admin by creating an admin principal. While asking for password , enter password as thinkbig.
kadmin.local -q "addprinc admin/admin"
- Confirm that this admin principal has permissions in the KDC ACL. Using a text editor, open the KDC ACL file:
vi /var/kerberos/krb5kdc/kadm5.acl
- Ensure that the KDC ACL file includes an entry so to allow the admin principal to administer the KDC for your specific realm. The file should have an entry:
*/quickstart.cloudera*
- After editing and saving the kadm5.acl file, you must restart the kadmin process.
/etc/rc.d/init.d/kadmin restart
- Create a user in the linux by typing below. We will use this user to test whether the Kerberos authentication is working or not. We will first run the command hadoop fs ls / but switching to this user. And we will run the same command again when we enable Kerberos.
adduser testUser
su testUser
hadoop fs ls /
Install Kerberos on Cloudera Cluster
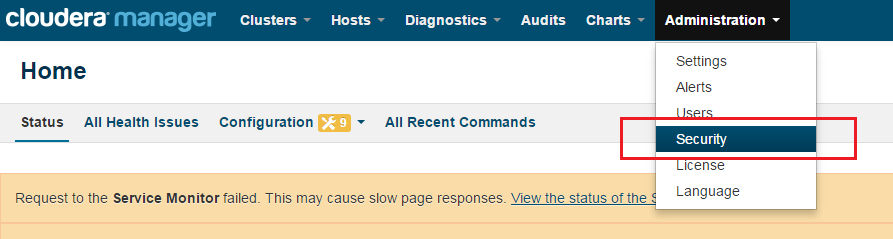
Login to Cloudera Manager and Select Security option from Administration tab.
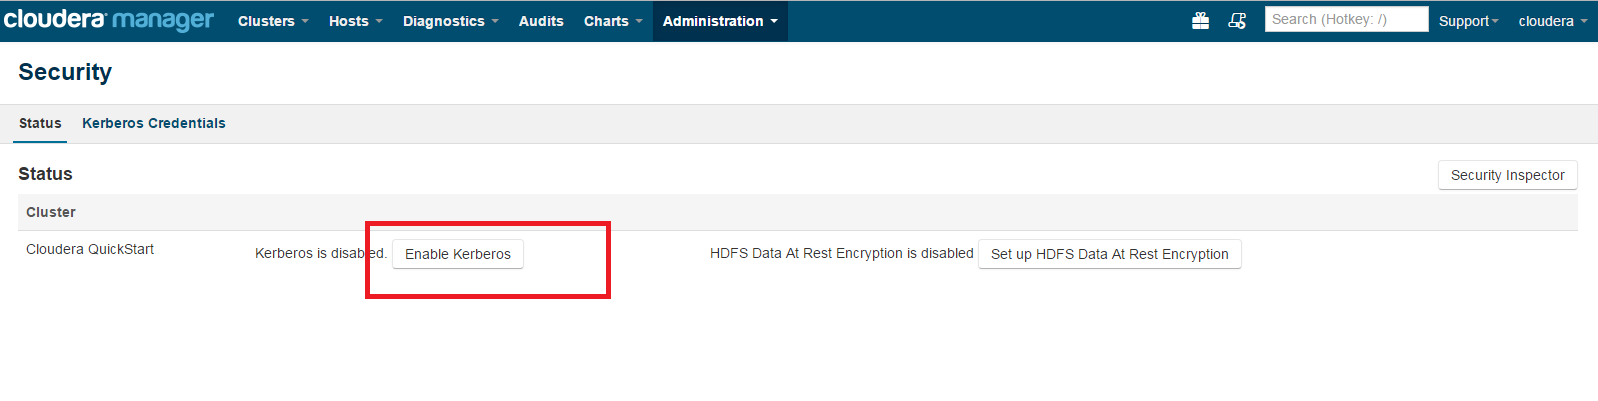
Click on Enable Kerberos.
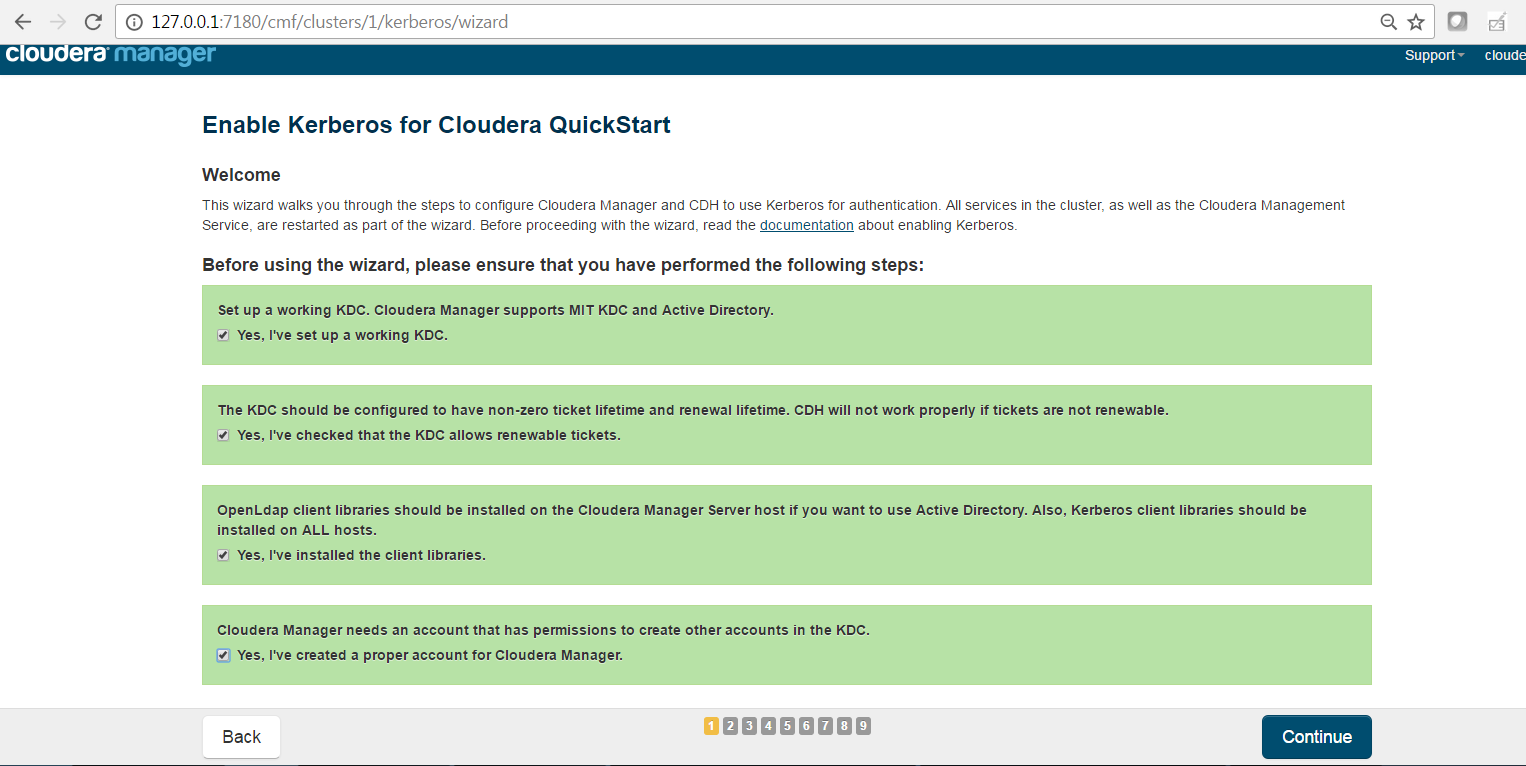
Select each item and click on continue.
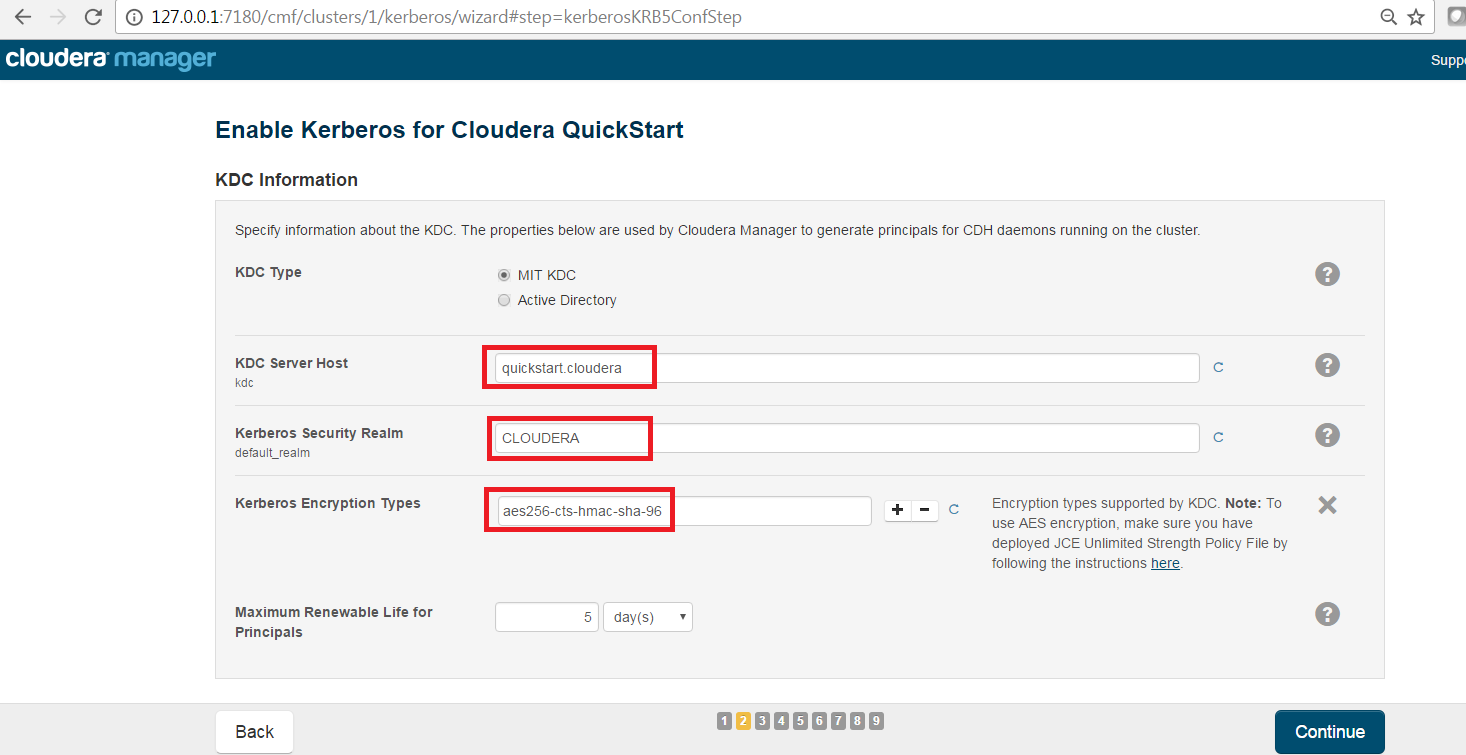
The Kerberos Wizard needs to know the details of what the script configured. Fill in the entries as follows and click continue.
KDC Server Host: quickstart.cloudera
Kerberos Security Realm: quickstart.cloudera
Kerberos Encryption Types: aes256-cts-hmac-sha1-96
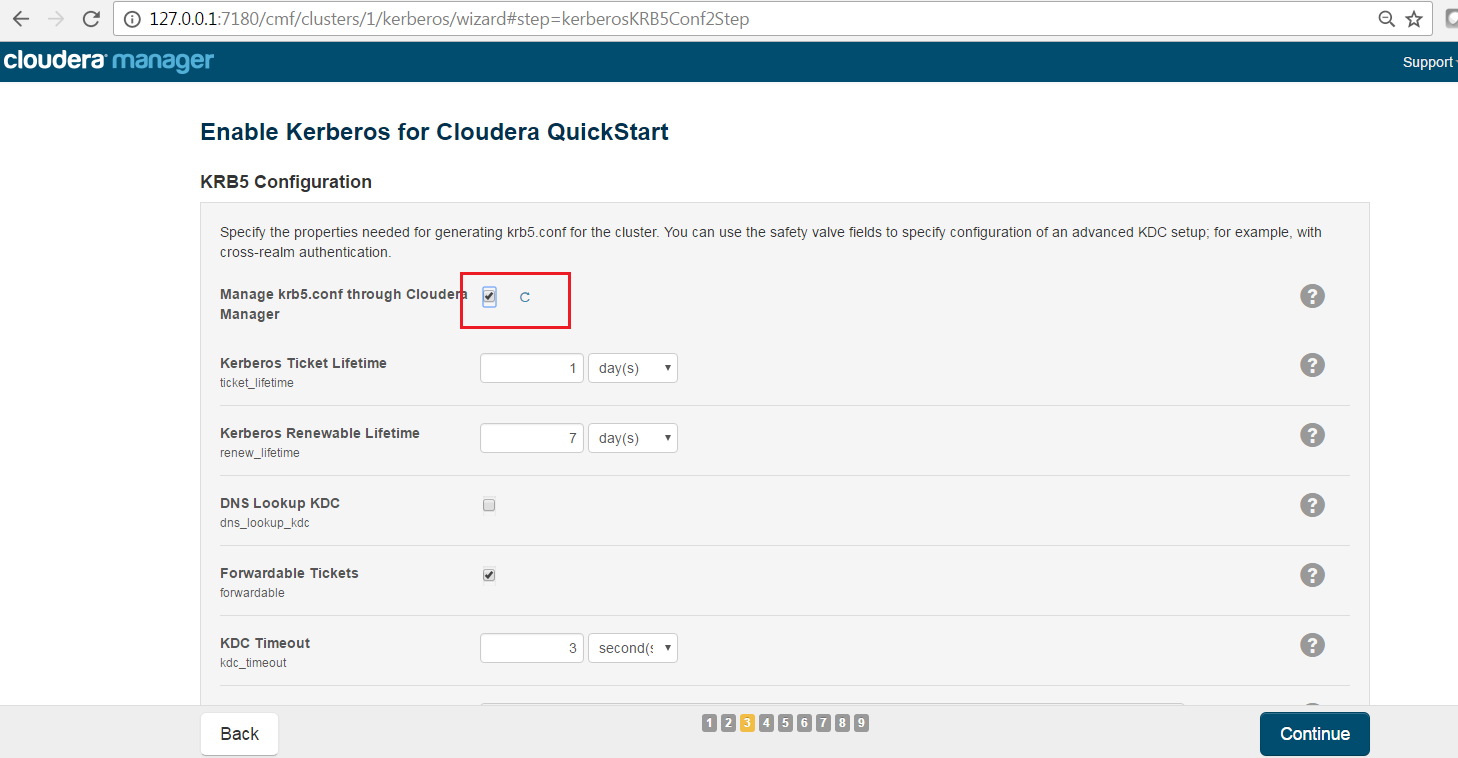
Select checkbox Manage krb5.conf through cloudera manager.
Enter username and password for of KDC admin user.
Username : admin/admin@quickstart.cloudera
Password : thinkbig
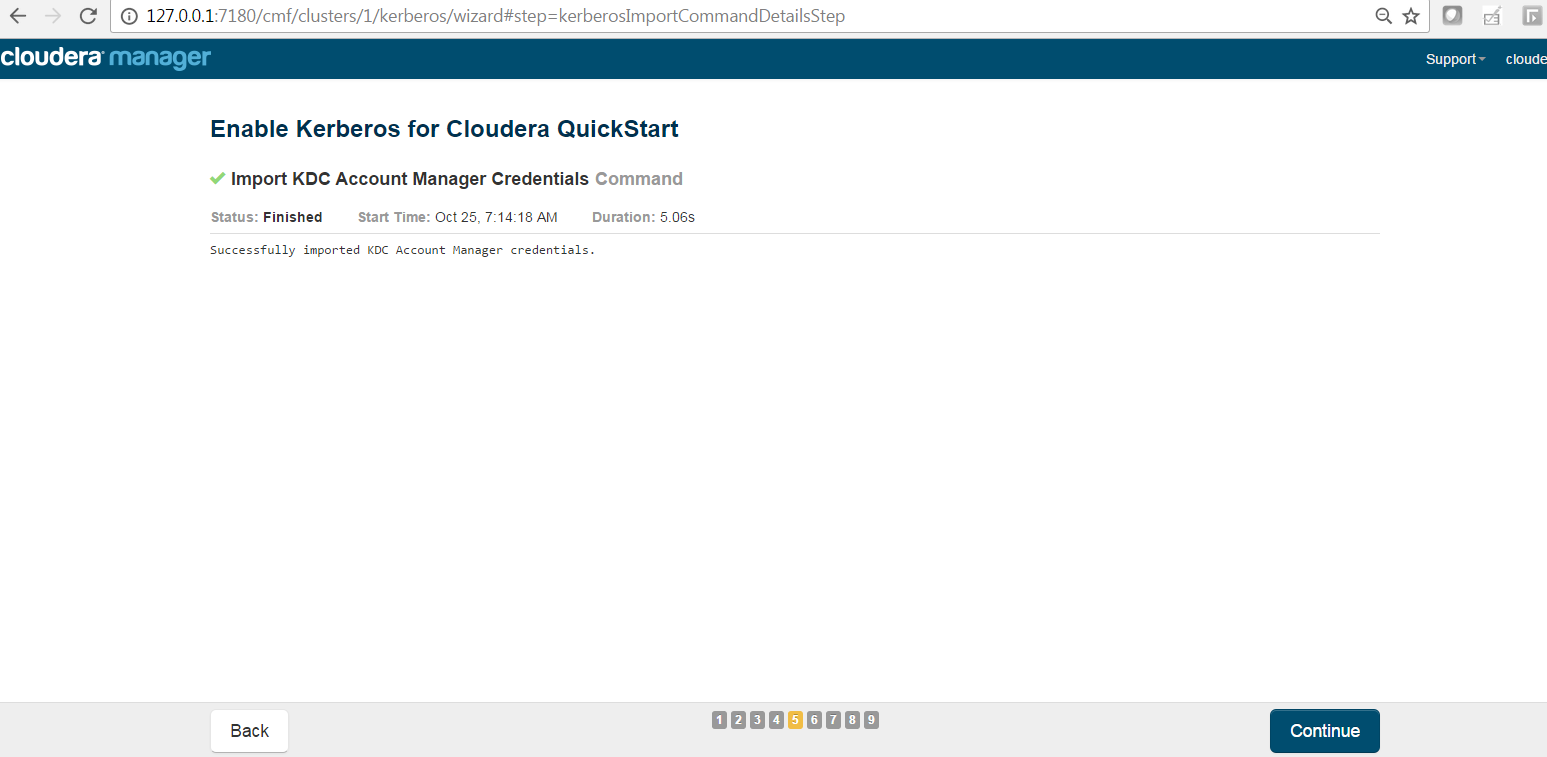
The next screen provides good news. It lets you know that the wizard was able to successfully authenticate.
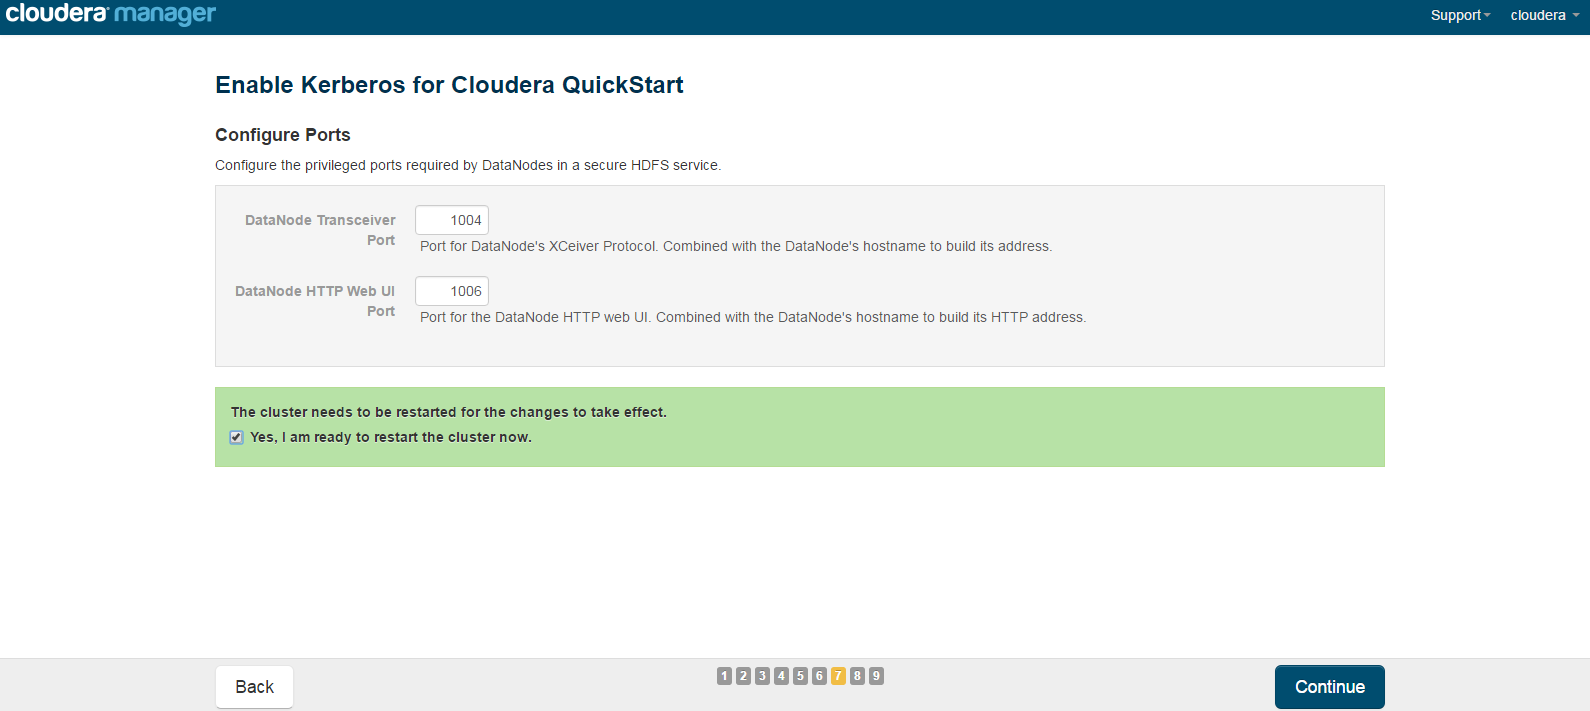
Select “I’m ready to restart the cluster now” and click on continue.
Make sure all services started properly. Kerberos is successfully installed on cluster.
KeyTab Generation
- Create a keytab file for Nifi user.
kadmin.local
addprinc -randkey nifi@quickstart.cloudera
xst -norandkey -k /etc/security/nifi.headless.keytab nifi@quickstart.cloudera
exit

chown nifi:hadoop /etc/security/keytabs/nifi.headless.keytab
chmod 440 /etc/security/keytabs/nifi.headless.keytab

[Optional] You can initialize your keytab file using below command.

kinit -kt /etc/security/keytabs/nifi.headless.keytab nifi