NiFi and SSL
This link provides additional instruction for enabling SSL for NiFi:
Creating a Self-signed Cert
- Download the NiFi toolkit from https://nifi.apache.org/download.html
- Unzip it to a directory.
/opt/nifi/nifi-toolkit-1.0.0
- Go into that directory.
cd /opt/nifi/nifi-toolkit-1.0.0/bin
- Update the “tls-toolkit.sh” file and add the current version of JAVA_HOME.
- Add this line to the start of the script:
export JAVA_HOME=/opt/java/current
- Make an SSL directory under /opt/nifi/data as the nifi owner:
mkdir /opt/nifi/data/ssl
chown nifi /opt/nifi/data/ssl
- Change to that directory and generate certs using the tls-toolkit.
  cd /opt/nifi/data/ssl
  /opt/nifi/nifi-toolkit-1.0.0/bin/tls-toolkit.sh standalone -n 'localhost' -C 'CN=kylo, OU=NIFI' -o .

.. note:: Use the hostname of the NiFi node if running Kylo and NiFi on different servers to prevent certificate issues
This will generate one client cert and password file along with a server keystore and trust store:
-rwxr-xr-x 1 nifi root 1675 Apr 26 21:28 nifi-key.key
-rwxr-xr-x 1 nifi root 1200 Apr 26 21:28 nifi-cert.pem
-rwxr-xr-x 1 nifi root   43 Apr 26 21:28 CN=kylo_OU=NIFI.password
-rwxr-xr-x 1 nifi root 3434 Apr 26 21:28 CN=kylo_OU=NIFI.p12
drwxr-xr-x 2 nifi root 4096 Apr 26 21:46 localhost
Note
The client cert is the p.12 (PKCS12) file along with its respective password. This will be needed later when you add the client cert to the browser/computer.
The directory ‘localhost’ is for the server side keystore and truststore .jks files.
-rwxr-xr-x 1 nifi root 3053 Apr 26 21:28 keystore.jks
-rwxr-xr-x 1 nifi root  911 Apr 26 21:28 truststore.jks
-rwxr-xr-x 1 nifi root 8921 Apr 26 21:28 nifi.properties
- Change permissions on files.
chown nifi -R /opt/nifi/data/ssl/*
chmod 755 -R /opt/nifi/data/ssl/*
Merge the generated properties (/opt/nifi/data/ssl/localhost) with the the NiFi configuration properties (/opt/nifi/current/conf/nifi.properties).
- Open the /opt/nifi/data/ssl/localhost/nifi.properties file.
- Compare and update the below properties
Note
Below is an example. Do not copy this text directly, as your keystore/truststore passwords will be different!
# Site to Site properties
nifi.remote.input.host=localhost
nifi.remote.input.secure=true
nifi.remote.input.socket.port=10443
nifi.remote.input.http.enabled=true
nifi.remote.input.http.transaction.ttl=30 sec

# web properties #
nifi.web.war.directory=./lib
nifi.web.http.host=
nifi.web.http.port=
nifi.web.https.host=0.0.0.0
nifi.web.https.port=9443
nifi.web.jetty.working.directory=./work/jetty
nifi.web.jetty.threads=200

# security properties #
nifi.sensitive.props.key=
nifi.sensitive.props.key.protected=
nifi.sensitive.props.algorithm=PBEWITHMD5AND256BITAES-CBC-OPENSSL
nifi.sensitive.props.provider=BC
nifi.sensitive.props.additional.keys=

nifi.security.keystore=/opt/nifi/data/ssl/localhost/keystore.jks
nifi.security.keystoreType=jks
nifi.security.keystorePasswd=fCrusEdGOKdik7P5UORRegQOILoZTBQ+9kyhf8D+PUU
nifi.security.keyPasswd=fCrusEdGOKdik7P5UORRegQOILoZTBQ+9kyhf8D+PUU
nifi.security.truststore=/opt/nifi/data/ssl/localhost/truststore.jks
nifi.security.truststoreType=jks
nifi.security.truststorePasswd=DHJS0+HIaUMRkhrbqlK/ys5j7iL/ef9mnGJIDRlFokA
nifi.security.needClientAuth=
nifi.security.user.authorizer=file-provider
nifi.security.user.login.identity.provider=
nifi.security.ocsp.responder.url=
nifi.security.ocsp.responder.certificate=
- Edit the /opt/nifi/data/conf/authorizers.xml file to add the initial admin identity. This entry needs to match the phrase you used to generate the certificates in step 6.
<property name="Initial Admin Identity">CN=kylo,OU=NIFI</property>
Here is an example:
<authorizer>
    <identifier>file-provider</identifier>
    <class>org.apache.nifi.authorization.FileAuthorizer</class>
    <property name="Authorizations File">./conf/authorizations.xml</property>
    <property name="Users File">./conf/users.xml</property>
    <property name="Initial Admin Identity">CN=kylo, OU=NIFI</property>
    <property name="Legacy Authorized Users File"></property>

    <!-- Provide the identity (typically a DN) of each node when clustered, see above description of Node Identity.
    <property name="Node Identity 1"></property>
    <property name="Node Identity 2"></property>
    -->
</authorizer>
For reference: This will create a record in the /opt/nifi/current/conf/users.xml. Should you need to regenerate your SSL file with a different CN, you will need to modify the users.xml file for that entry.
- Set the following parameters in the kylo-services “application.properties” file for the NiFi connection.
nifi.rest.host=localhost
nifi.rest.https=true
### The port should match the port found in the /opt/nifi/current/conf/nifi.properties (nifi.web.https.port)
nifi.rest.port=9443
nifi.rest.useConnectionPooling=false
nifi.rest.truststorePath=/opt/nifi/data/ssl/localhost/truststore.jks
##the truststore password below needs to match that found in the nifi.properties file (nifi.security.truststorePasswd)
nifi.rest.truststorePassword=UsqLPVksIe/taZbfpVIsYElF8qFLhXbeVGRgB0pLjKE
nifi.rest.truststoreType=JKS
nifi.rest.keystorePath=/opt/nifi/data/ssl/CN=kylo_OU=NIFI.p12
###value found in the .password file /opt/nifi/data/ssl/CN=kylo_OU=NIFI.password
nifi.rest.keystorePassword=mw5ePri
nifi.rest.keystoreType=PKCS12
Importing the Client Cert on the Mac
Copy the .p12 file that you created above (/opt/nifi/data/ssl/CN=kylo_OU=NIFI.p12) in step 6 to your Mac.
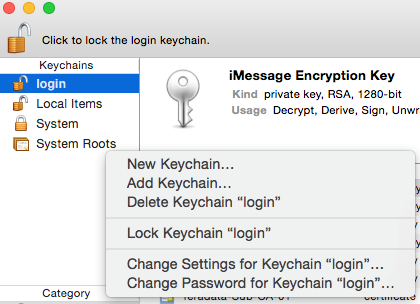
Open Keychain Access.
Create a new keychain with a name. The client cert is copied into this new keychain, which in the example here is named “nifi-cert”. If you add it directly to the System, the browser will ask you for the login/pass every time NiFi does a request.
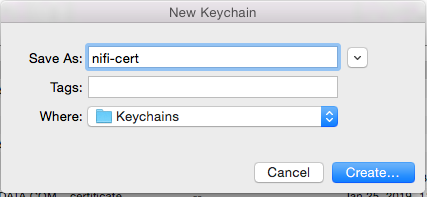
In the left pane, right-click “Keychains” and select “New Keychain”.
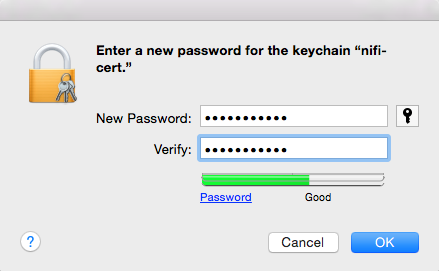
Give it the name “nifi-cert” and a password.
 |
 |
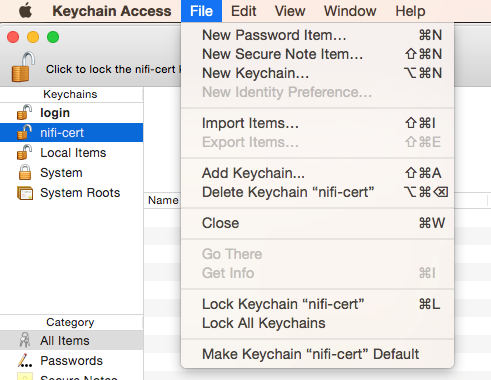
- Once the keychain is created, click on it and select File -> import Items, and then find the .p12 file that you copied over in step 1.
 |
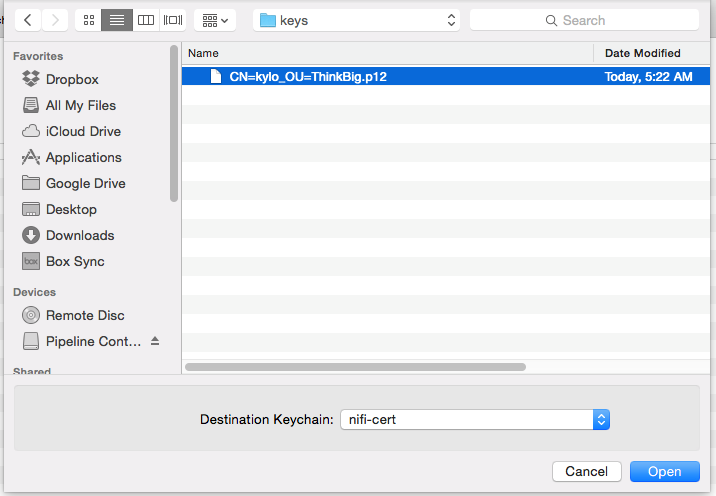 |
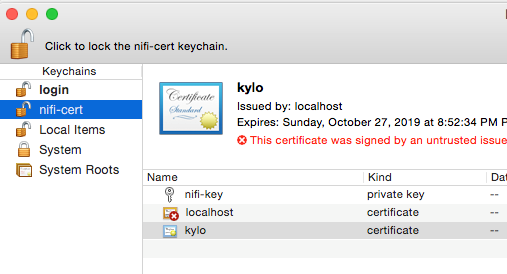
Once complete you should have something that looks like this:
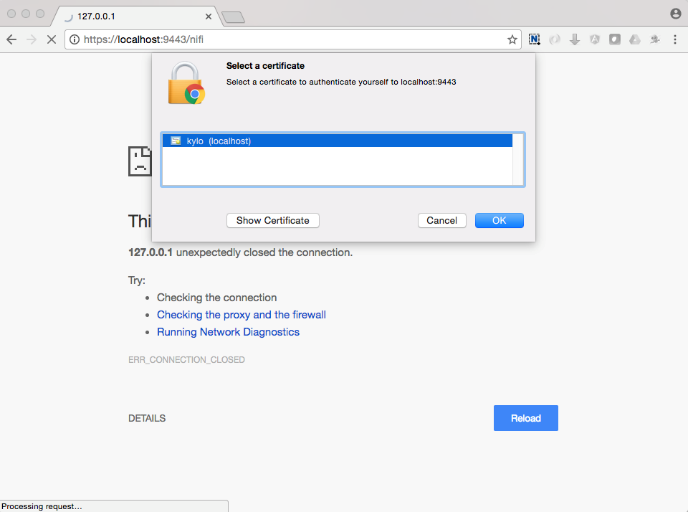
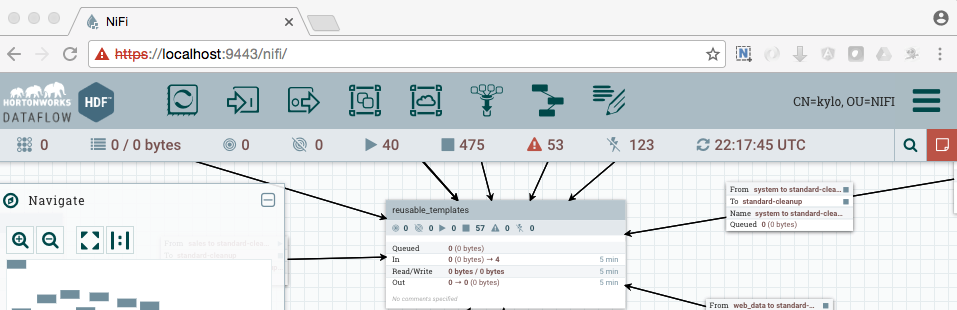
Accessing NiFi under SSL
Open the port defined in the NiFi.properties above: 9443.
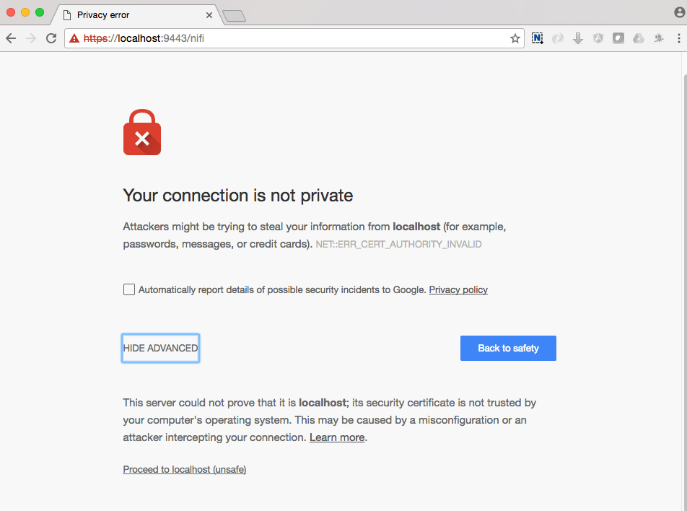
The first time you connect to NiFi (https://localhost:9443/nifi) you will be instructed to verify the certificate. This will only happen once.
Click OK at the dialog prompt.
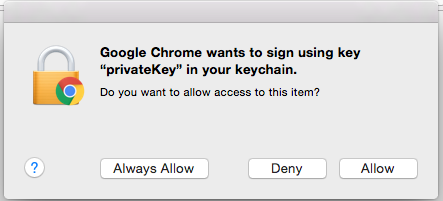
Enter the Password that you supplied for the keychain. This is the password that you created for the keychain in “Importing the Client Cert on the Mac” Step 3b.

Click Always Verify.
Click AdvancKyloConfiguration.rsted and then Click Proceed. It will show up as “not private” because it is a self-signed cert.
NiFi under SSL. Notice the User name matches the one supplied via the certificate that we created: “CN=kylo, OU=NIFI”.
Refer to the Hortonworks documentation on Enabling SSL for NiFi: